
Germination tips
If you are starting your own transplants or growing indoors, we have a few tips to help ensure the seeds germinate properly.
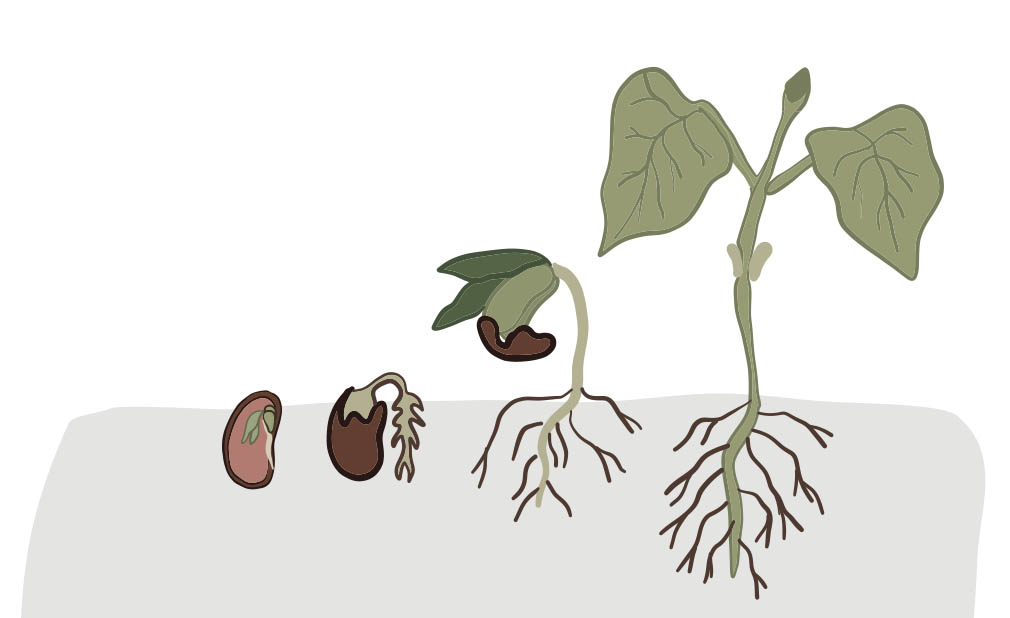
A seed contains the food for the baby plant, which is stored in the seed leaves. This supplies the forming seedling with the energy to form roots, extend a stem and begin to grow.
Moisture
Adequate and consistent moisture is critical for germinating seeds. The first role moisture plays is to open the seed coat and to release the seed from dormancy. Seeds like a consistently moist, but not soggy environment. They do not tolerate repeated wet-dry cycles. If the environment becomes soggy, or saturated, they may suffocate or develop a fungal rot known as damping off.
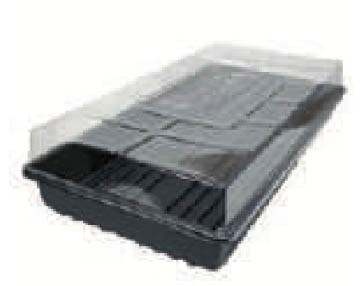
We recommend using your clear plastic dome on your seed trays while they are germinating. You can also wrap seed trays with a plastic or wax paper. This helps you to maintain adequate moisture. Remove the dome once seeds sprout. You can also use the dome cover if you plan to be away from the garden for a couple days, in order to preserve moisture.
Warmth
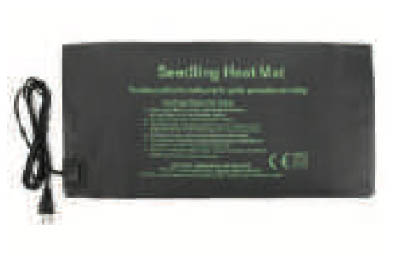
Seeds also require warmth for germination. If you concerned about the
temperatures, you can wrap your germinating seeds in a towel. Some people choose to use heat mats for their germinating seeds. This is a small mat that will give out a small amount of heat in which you can place your tray on top of. These can be found at most garden supply stores or online.
Light
Most seeds do not require light to germinate, but instead need dark (with the exception of some wild flower seeds). Because your seeds are covered with soil, placing them directly under your lights won’t hurt germination.
To soak or not to soak
Many gardeners will soak seeds to assist with germination. Soaking a seed overnight before planting can give your seeds a boost and cut down on a few days germination time. In the Little Green Thumbs garden, we recommend soaking peas, beans and nasturtiums, though it is not required. You can even try soaking chard! Smaller seeds like lettuce, radish and basil are difficult to handle once soaked and don’t really need it anyway.
Calculate harvest dates from germination dates
Use your seed starting chart to mark the date your seeds were planted. Go back to the chart to mark when you first saw the seeds germinate. You can then calculate approximately when you will be able to harvest your vegetables based on the ‘Days to Maturity’ listed on the seed package.
Check your seeds viability
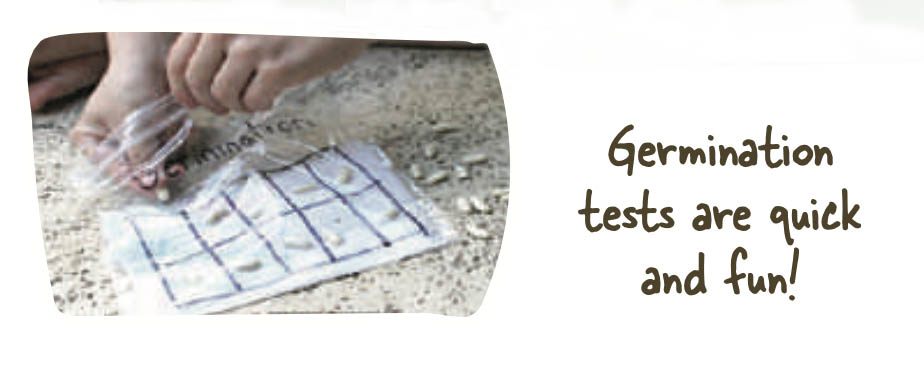
You can check if your seeds are still viable with a simple germination test. Count the number of seeds you are going to test. Soak a piece of paper towel and spread the counted seeds over one side of the towel, the fold the other half over the seeds. Fold or roll up the paper towel and place it into a ziplock or plastic bag. Check the Days to Germination number for your particular seeds. This number can be found on the seed package and is the number of days it will take for seeds to sprout. After that amount of days, open up to see if your seeds have sprouted. You can keep checking every day for a few days. Count the number of healthy looking sprouts and divide by the number of seeds you first laid out. This is your germination percentage. Ensure your paper towel does not dry out for this time period. Adjust the amount of seeds you plant based on your germination percentage.
Thanks to Little Green Thumbs for providing the information and images on this page.
![]()