
How to dehydrate vegetables and fruits
easy
Food drying, born of necessity centuries ago is regaining popularity today. Drying or dehydrating removes enough moisture from the food so moulds, bacteria, and yeast do not grow. Dehydrated foods are convenient, store easily and have a long shelf life when properly stored in airtight containers in a cool, dry, dark location. Food drying does not improve the quality of vegetables or fruit, so its important to select high quality products at the desired stage of ripeness.
The process requires a constant temperature hot enough to dry foods without cooking, plus air circulation to ensure even drying and to carry away any moisture given off by the food. Experiment with conventional and convection ovens for small batch drying.
If you enjoy the experience and the results you may want to invest in a dehydrator. While microwave ovens are a worthy kitchen appliance, they are not designed for drying food. Dehydrators are versatile, dry evenly with the best quality and are efficient using less power than your oven. There are two main types of dehydrators featuring either vertical or horizontal air flows. Some experts suggest horizontal models are more efficient as several kinds of similar foods can be dried at the same time without flavor mingling. Costs vary depending on features offered. Important features include enclosed heating element, enclosed thermostat, fan, mesh trays that are easily washable, dial for regulating temperature and a timer.
Drying food in a conventional oven requires time, patience and scheduling:
- To achieve positive results, maintain a low temperature of 40º to 70º (100º-150ºF) as specified in the recipe; keep the oven door slightly open and rotate the food frequently to promote even drying.
- Placing a fan near the oven door opening will create more air circulation and help with the evaporation process.
- Keep in mind that the trays holding the food be no closer than 3 cm (1 1/2 inches) from oven walls and 7.5 cm (3 inches) between racks.
- Uniformity of food size is equally important for drying no matter if slicing, dicing, cubing or leaving whole.
- As well, arrange food in a single layer, and keep enough space between the pieces on the tray to encourage even drying.
- Place an oven thermometer near the food to get an accurate reading of the drying temperature.
- Although virtually any food can be dehydrated, experiment with fruits and vegetables to gain experience before tackling more complicated food products like fish, poultry and meat.
Preparing vegetables for drying:
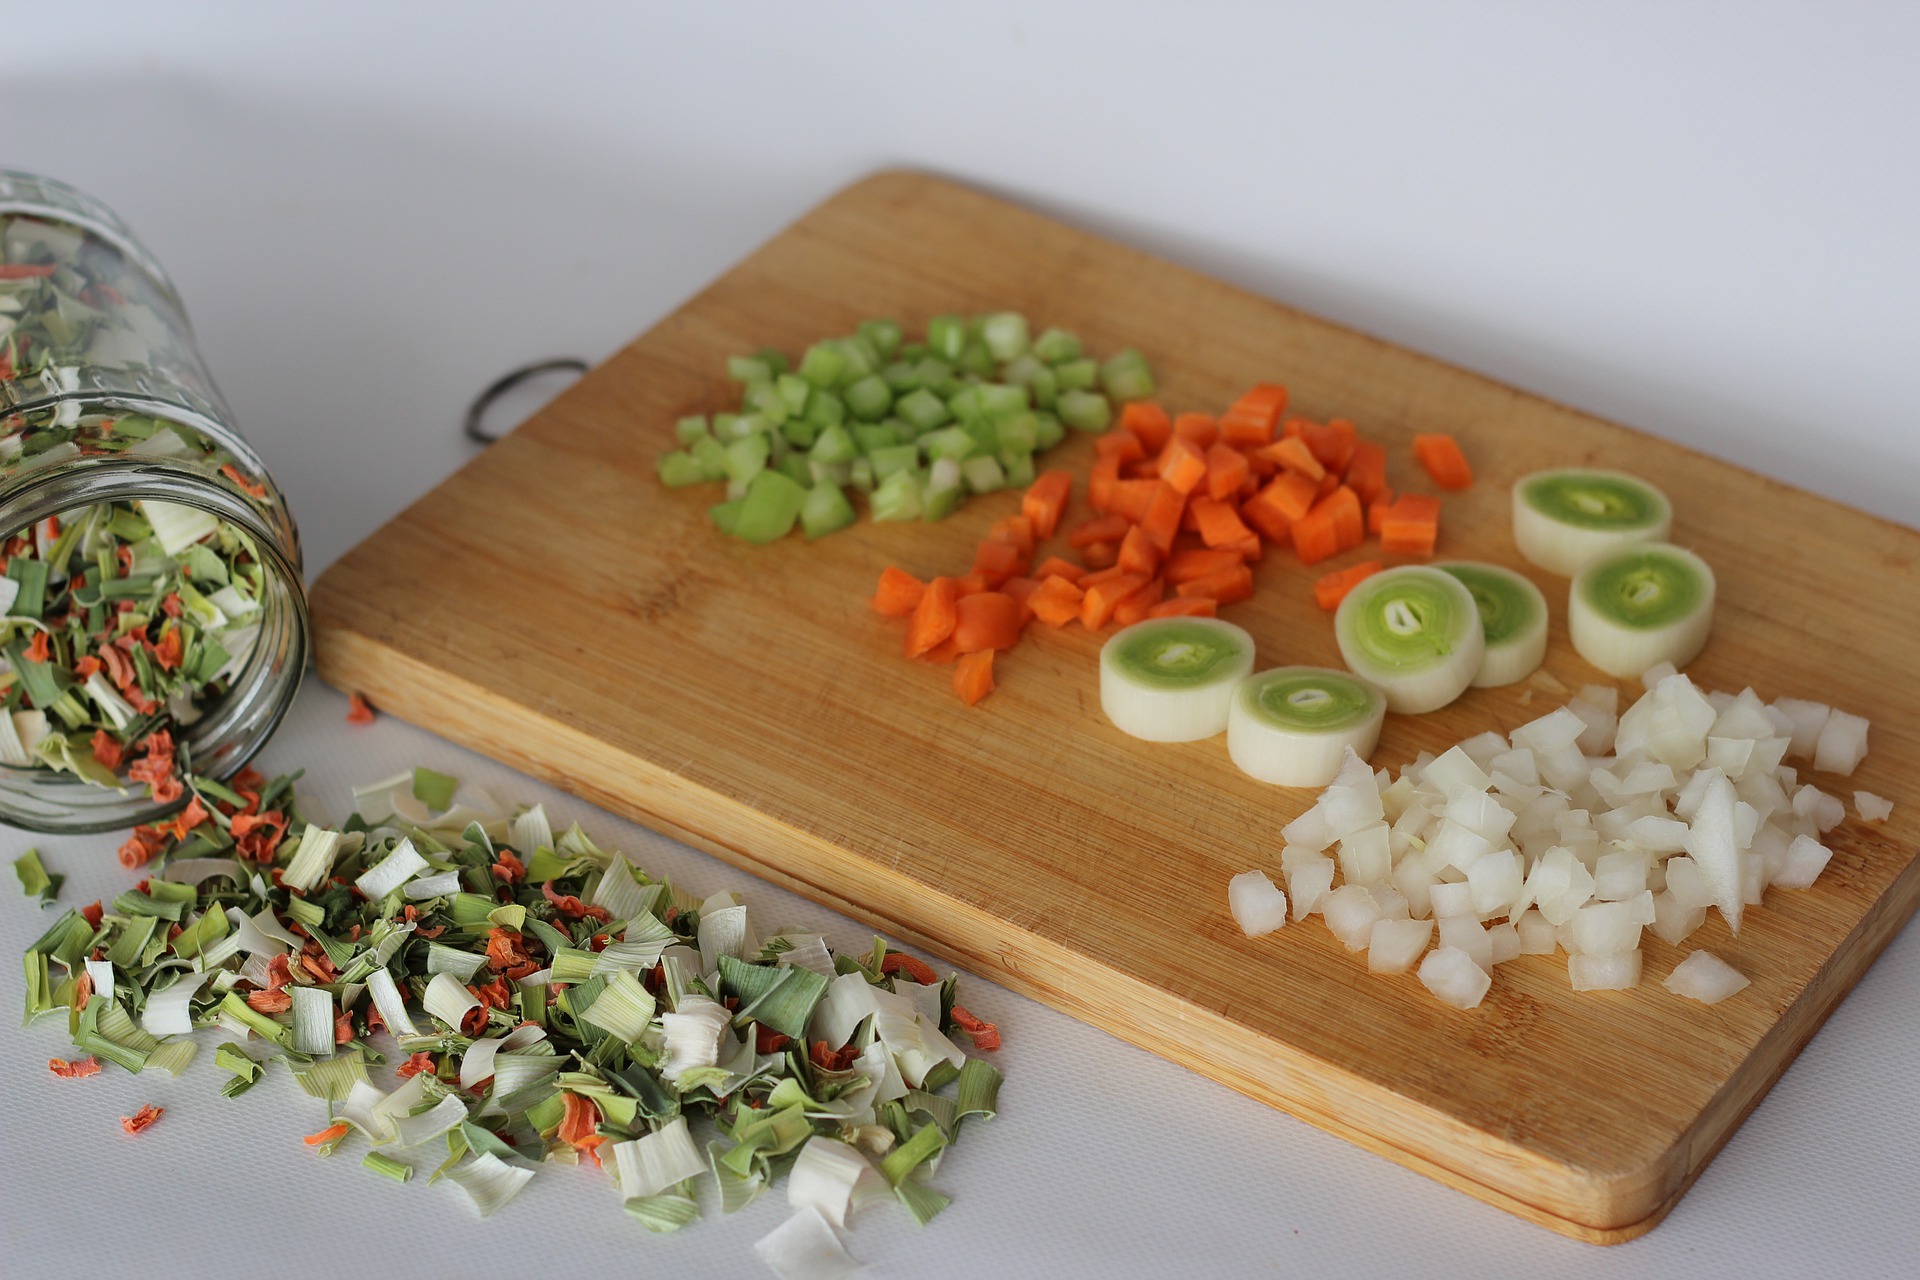
- For vegetable drying, wash selected vegetables, blanch, slice, dice or shred. Blanching helps slow enzyme activity, preserving quality during storage, as well as helping to preserve color. If water blanching, fill a large pot 2/3 full of water, cover and bring to a rolling boil. Place the vegetables in a wire basket or a colander and submerge them in the water. Cover and blanch according to recognized blanching directions. Begin timing when water returns to boiling. If it takes longer than one minute for the water to come back to boiling, too many vegetables were added. Reduce the amount in the next batch.
- To steam blanch, use a deep pot with a tight-fitting lid and a wire basket, colander or sieve placed so the steam will circulate freely around the vegetables. Add water to the pot and bring to a rolling boil. Place the vegetables loosely in the basket no more than 5 cm (2 inches) deep. Place the basket of vegetables in the pot, making sure the water does not come in contact with the vegetables. Cover and steam according to the directions.
- After blanching, dip the vegetables briefly in cold water. When they feel only slightly hot to the touch, drain the vegetables. Arrange the vegetables in a single layer on prepared baking sheet or dehydrator trays. Then place immediately in the dehydrator or oven. Set oven temperature at 60ºC (140ºF). Prop oven door open for entire drying time. Rotate and turn trays every hour. Drying time depends on type of vegetables and size of pieces.
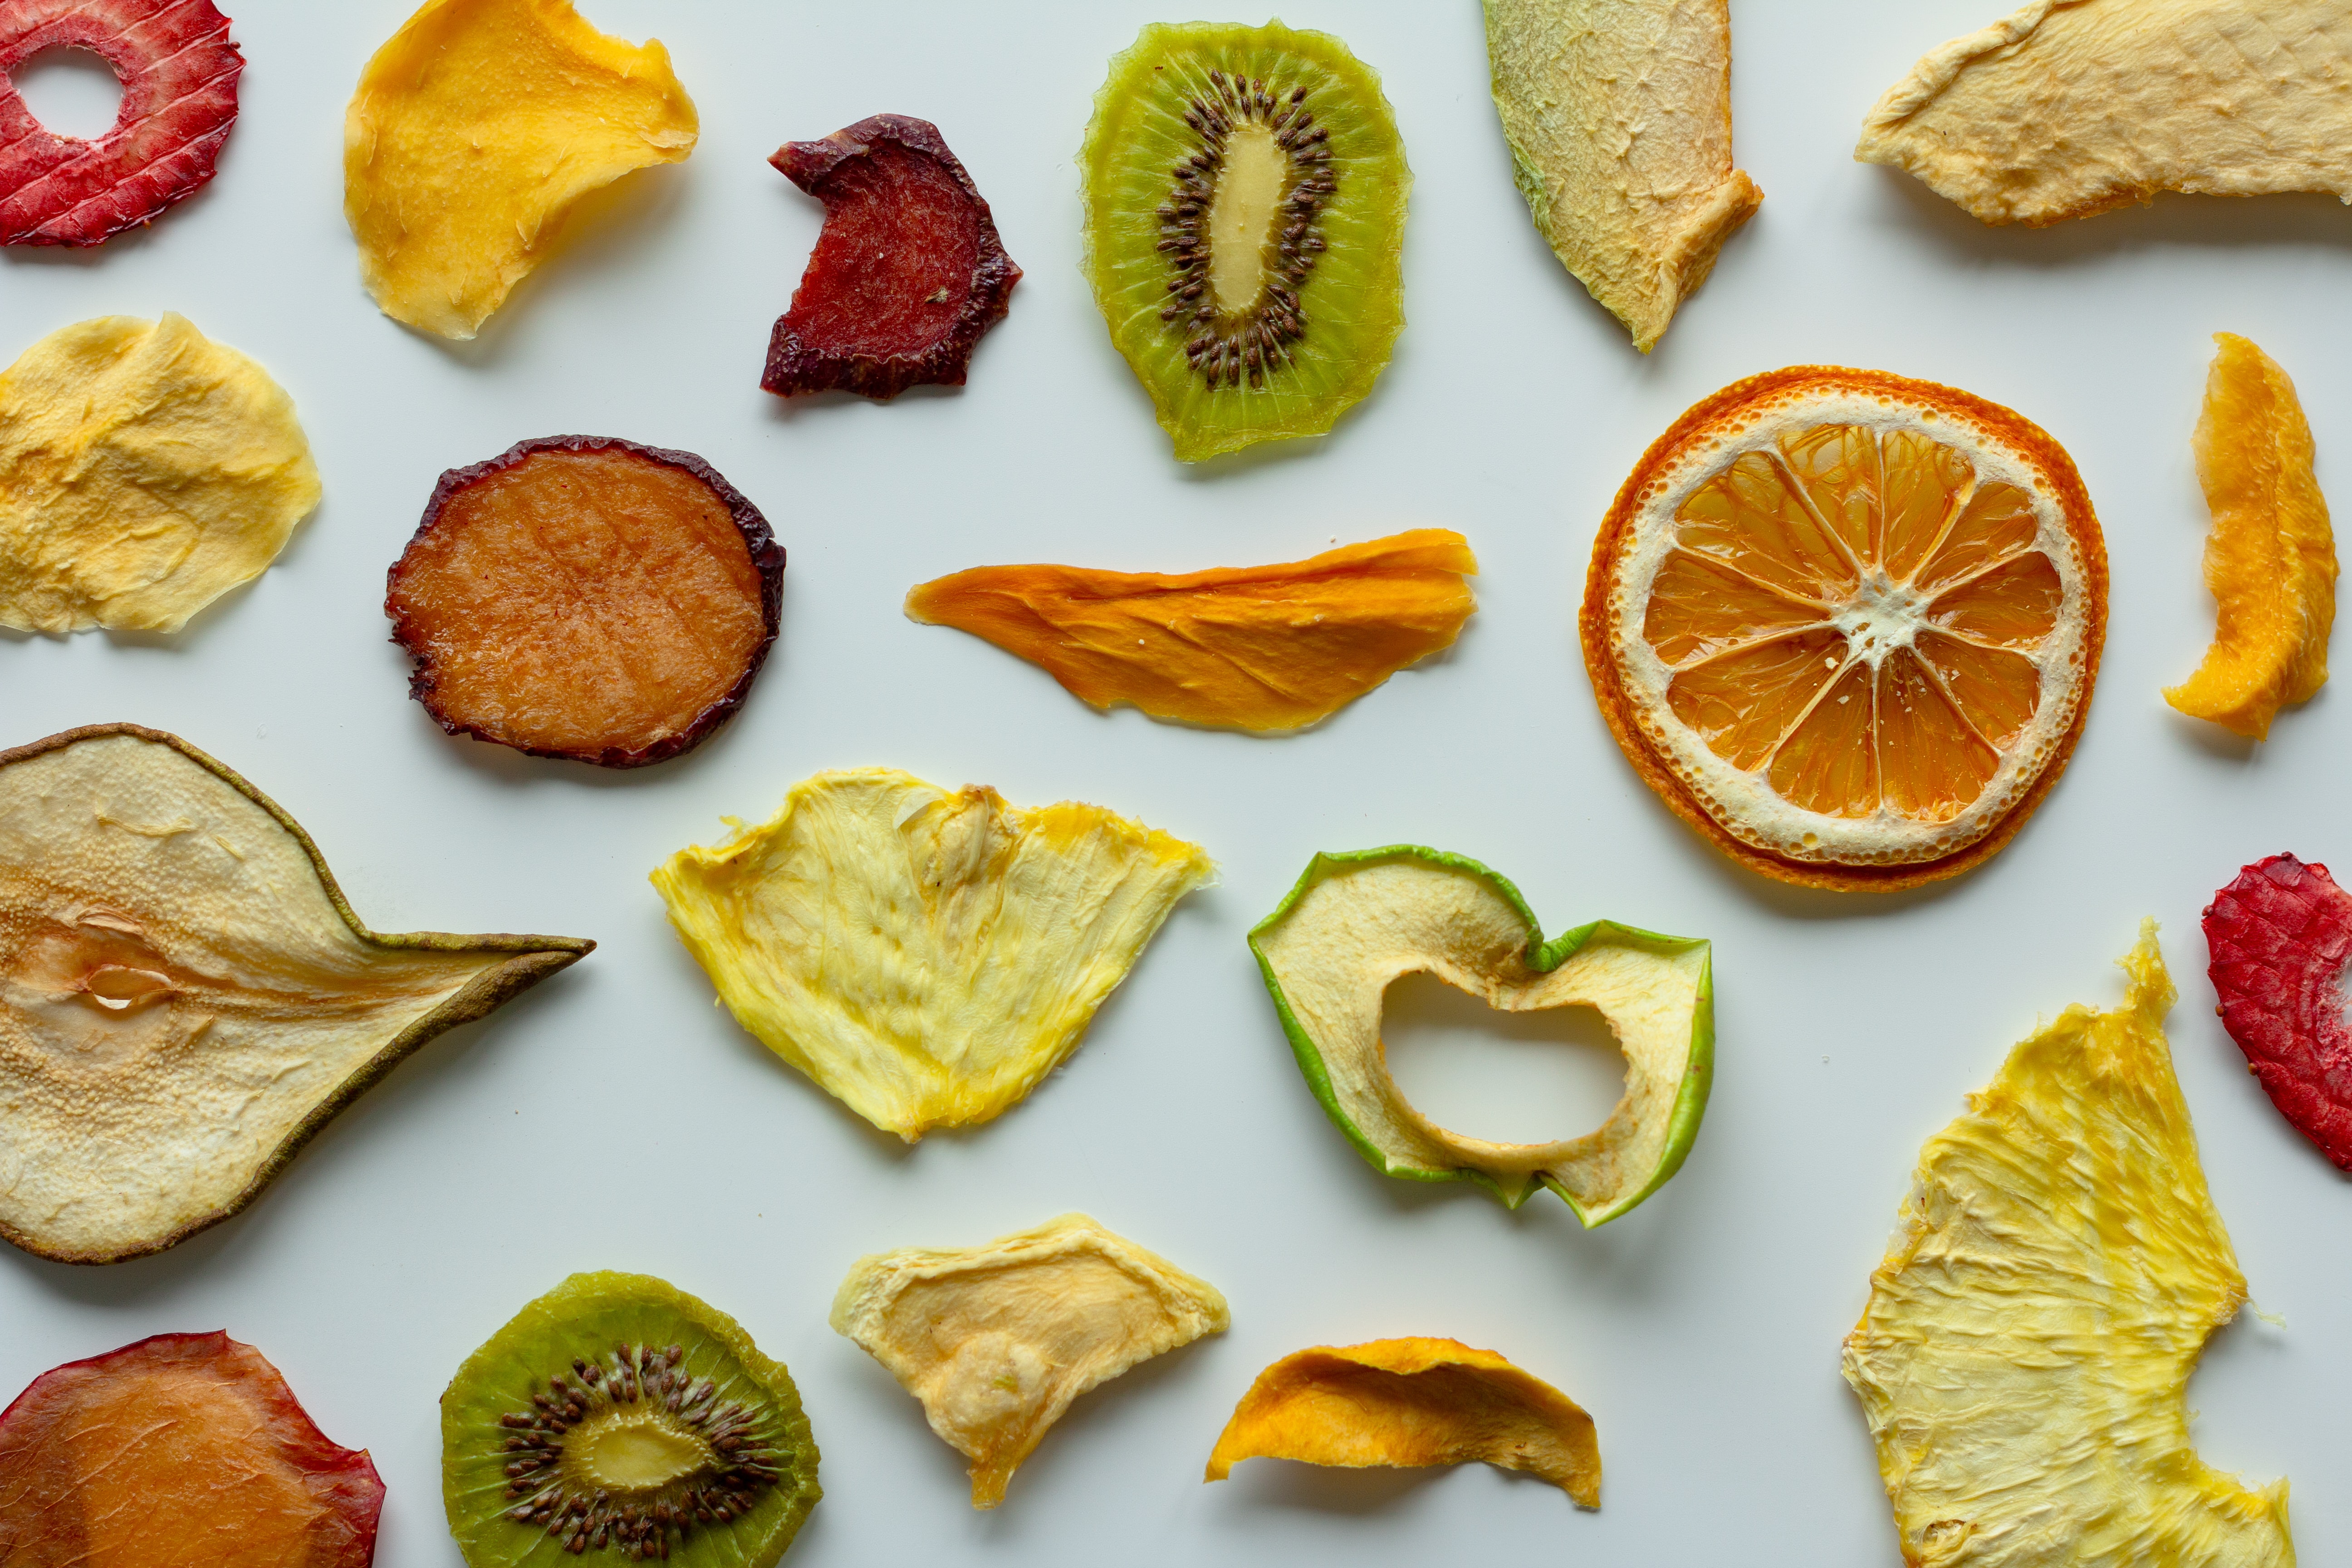
- The heat left in the vegetables from blanching will cause the drying process to begin more quickly. Watch the vegetables closely at the end of the drying period. They dry much more quickly at the end and could scorch. Vegetables should be dried until they are brittle or crisp. Some vegetables would actually shatter if hit with a hammer. At this stage, they should contain about 10 percent moisture.
- Cool a piece of vegetable and test for doneness using a reliable chart. (the chart that came with your dehydrator or University Extension Services fact sheets on drying). Vegetables like broccoli, celery, corn and eggplant should be dry and brittle.
- Beets, cabbage and carrots will be tough and leathery. Condition vegetables by storing in an airtight container for 10 days to distribute remaining moisture evenly throughout food. Store in airtight containers in a dry, cool, dark location.
Rehyrdating vegetables:
- Dried vegetables are good in stews, soups, and casseroles which require no presoaking as they rehydrate during the cooking process.
- Soak dehydrated vegetables for up to 2 hours in water to rehydrate, using a ratio of two parts water to one-part dried product for other recipes.
Preparing fruits for drying:
- Most fruits can be successfully dried with the exception of highwater content varieties like citrus. Use only firm, ripe, high quality fruits. Smaller fruits and berries, like grapes, cherries and blueberries can be dried whole, once their skins are broken by water blanching (30 to 60 seconds).
- Fruit pieces need to be uniform to dry evenly. When preparing larger batches of fruit for drying use a holding solution like ascorbic acid water solution, commercial antioxidant like Fruit Fresh or sulfur. We recommend against sulfuring as it complicated, expensive and can be irritating to eyes and possible breathing. Dried fruits can be consumed as is or cooked. Keep in mind that they have intense flavors and concentrated fruit sugars. Some fruits will remain pliable after drying, but they should not feel sticky.
Fruit and vegetable leathers make great afternoon snacks, super treats for the lunch bag brigade or lightweight energy snacks for hikers and long-distance walkers. Fruit leathers are simply homemade fruit rolls. These tasty chewy dried fruit products, are made by pouring pureed fruit onto a flat surface for drying. Fresh, frozen or canned fruit can be used as the base. When dried, the fruit is pulled from the surface and rolled. It gets the name "leather" from the fact that when pureed fruit is dried, it is shiny and has the texture of leather. The advantages of making your own fruit leathers are to save money; control the use of sugar, and mix fruit flavors. Leftover fruit pulp from making jelly can be blended and made into fruit rolls. For the diabetic adult or child, fruit leathers made without sugar may be a healthy choice for snacks or desserts.
Making fruit leathers are rather a simple but time-consuming process if you include the drying time.
- Select ripe or slightly overripe fruit. Wash fresh fruit or berries in cool water. Remove peel, seeds and stem. Cut fruit into chunks.
- Use 500 mL (2 cups) of fruit for each 25 x 38 cm (10 x 15-inch) fruit leather.
- Puree fruit until smooth. Add 10 mL (2 tsp) of lemon juice or 1mL (1/8 tsp) ascorbic acid for each 500 mL (2 cups) light colored fruit to prevent darkening. Optional: To sweeten, add corn syrup, honey or sugar. Corn syrup and honey are best for longer storage because they prevent crystals. Sugar is fine for immediate use or short storage. Use ¼ to ½ cup (50 to 125 mL) sugar, corn syrup or honey for each 2 cups (500 mL) of fruit.
- Line pan or plastic dehydrator trays with plastic wrap being careful to smooth out wrinkles. Do not use waxed paper or aluminum foil. Pour puree into the prepared sheet and spread evenly, about 3 mm (1/8-inch) thick. Avoid pouring puree too close to the edge of the baking sheet/tray. Approximate drying times are 6 to 8 hours in a dehydrator, up to 18 hours in an oven.
Vegetable leathers follow the same basic process with the added requirement of blanching.
- Blanch in steam or boiling water, following blanch times for freezing vegetables. Treat vegetables as required, to prevent browning (dip or coat each piece in solution of 5 mL (1 tsp.) ascorbic acid dissolved in 150 mL (2/3cup) water), drain and arrange on drying rack.
Fruit and vegetable leathers have a chewy, somewhat leathery consistency. Should the leather crack or chip, you over dried, however, they are still consumable in breakfast cereals and baked goods.
| Food | Approximate Dry Time | Test for dryness |
| Apple slices | 6 hours | Leathery |
| Peach slices | 8 hours | Leathery |
| Pear slices | 6 hours | Suede-like |
| Green wax beans | 4 - 12 hours | Brittle |
| Carrots | 4 - 12 hours | Slices will bend, shreds brittle |
| Beets | 4 - 12 hours | Slices will bend, shreds brittle |
| Green peppers | 4 - 12 hours | Crisp and brittle |
Storing and using fruit and vegetable leathers:
- After foods are dried, cool them completely.
- Condition the product for 7 to 10 days in a plastic or glass container no more than 2/3 full. Check daily for condensation on the container lid or any signs of spoilage.
- Then package them in clean moisture-vapor-resistant containers. Glass jars, metal cans or freezer containers are good storage containers, if they have tight-fitting lids. Plastic freezer bags are acceptable too.
- Label and date. Store in a cool, dry, dark location.
- Most dried fruits can be stored for 1 year at 16ºC (60ºF), 6 months at 27ºC (80ºF).
- Dried vegetables have about half the shelf-life of fruits (six to 12 months).
- Fruit leathers should keep for up to 1 month at room temperature. To store any dried product longer, place it in the freezer.
- Dried fruits can be eaten as is or reconstituted, and used in crisps, cobblers, pies and sauces.
- Dried vegetable should be reconstituted, unless being utilized in soups, stews and casseroles. Once reconstituted, dried fruits or vegetables are treated as fresh.
- Fruit leathers and meat jerky are eaten as is.
- To reconstitute dried fruits or vegetables, add water to the fruit or vegetable and soak until the desired volume is restored.
Strawberry Fruit Leather
- 250 mL mashed strawberries (1 cup) (Frozen berries can be used if fresh are unavailable)
- 1 apple - peeled, cored and sliced (1)
- 15 mL honey (1 tablespoon)
- Puree strawberries and apple in a blender.
- In a saucepan, mix strawberry puree and honey. Simmer over medium heat 5 minutes. Allow to cool slightly.
- Spread plastic wrap over two baking sheets. Spread the strawberry mixture thinly on the plastic wrap.
- Place in a 70 C (150 F) oven for 4 to 6 hours with the door ajar, until leathery in texture. Check frequently.
- Peel leather from the wrap, then reroll in a new piece of plastic wrap. Store in an air tight container.
Yield: 2 to 4 leather rolls
Vegetable Leather
- 500 mL chopped fresh tomatoes (2 cups)
- 1 green pepper, chopped
- 25 mL chopped onion (2 tablespoons)
- 125 mL chopped celery (1/2 cup)
- 2 medium carrot, sliced
- Combine tomatoes, pepper, onion, celery and carrots in heavy saucepan. Simmer over low heat, stirring occasionally to keep from sticking for 20 to 30 minutes, until carrots and celery are tender.
- Run through a food mill to make a smooth pulp.
- Cover drying trays or cookie sheets with plastic wrap and spread pulp to a thickness of 1/8 inch (3 mm) thick.
- Dry in dehydrator or oven at 150º F (70ºC) with oven door ajar.
- Dry until sticky and firm enough to pull away from the wrap easily. Turn over, remove plastic and dry until firm enough to form a stiff roll. Cool.
- Wrap rolls in wax, parchment or plastic wrap.
Yield: 2 to 4 leather rolls