
Note: Each section on this page contains multiple topics. Click on the tabs in each section for more information.
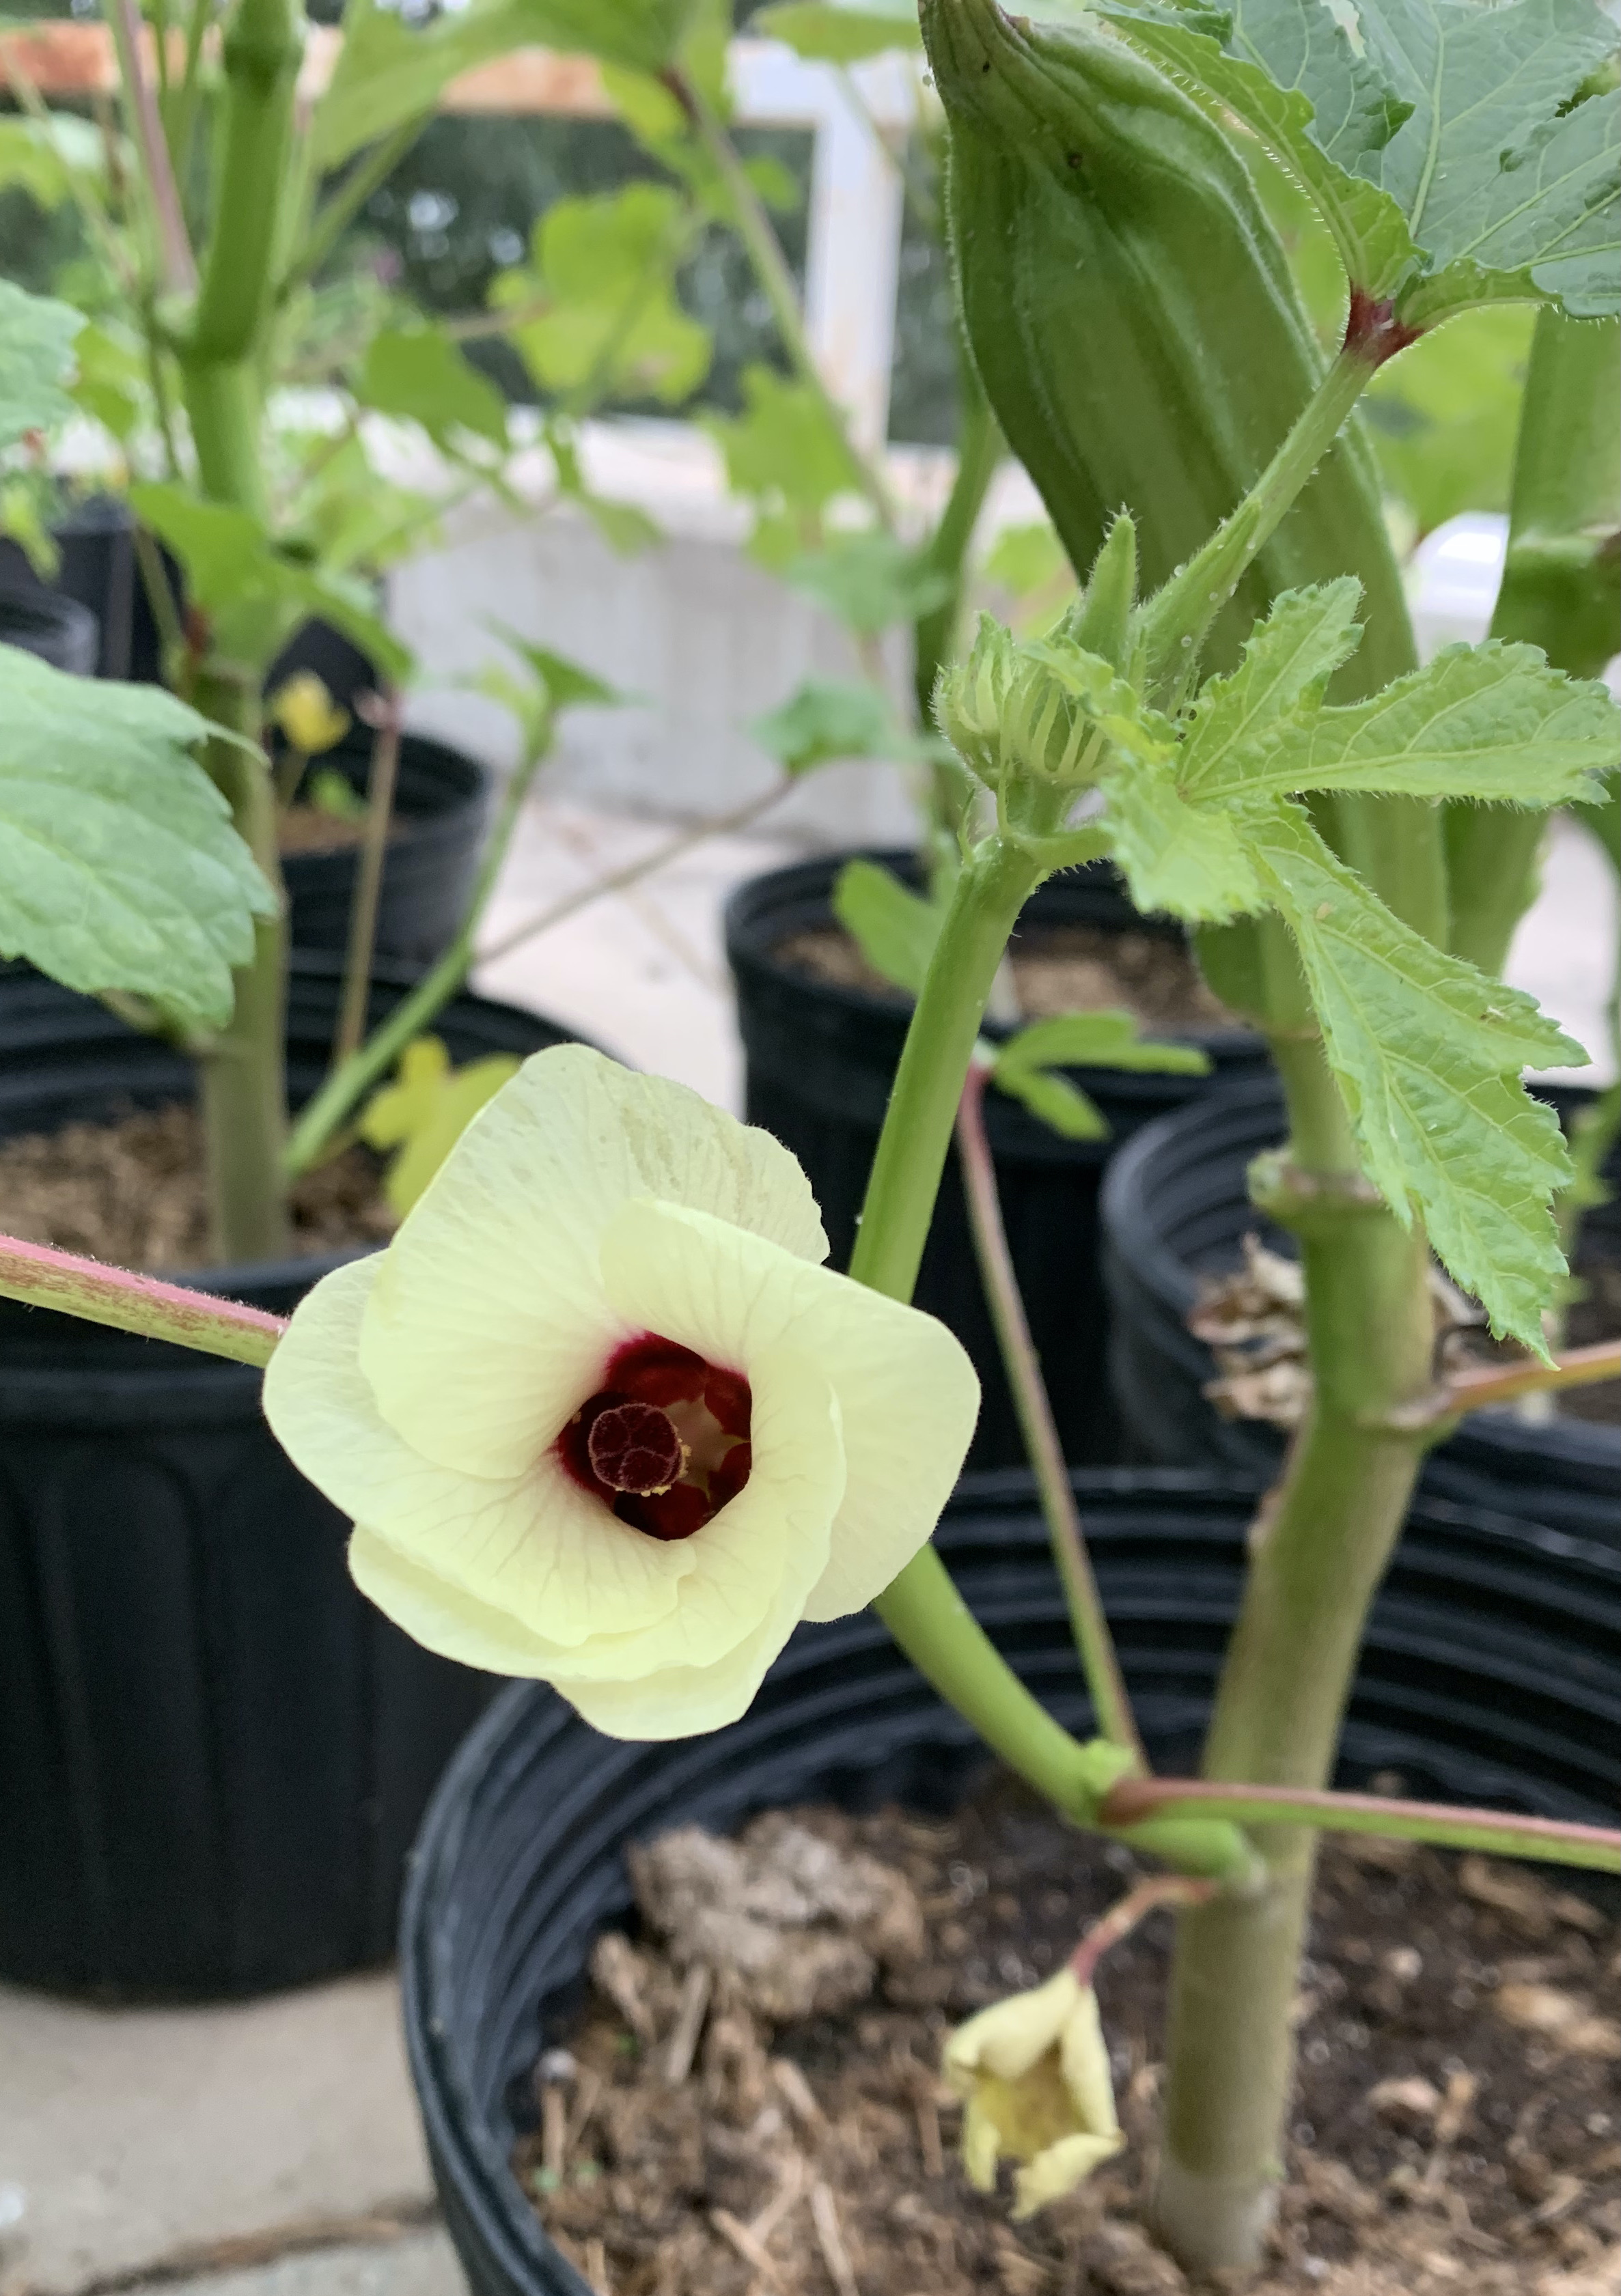
- Okra is a warm-season tropical plant, which originates from Africa. It requires full sun and warm temperatures. Okra is related to hibiscus and has lovely flowers and attractive leaves, making it a nice ornamental as well as edible plant.
- Okra pods are a popular ingredient in Asian, east Indian and Caribbean cuisine, especially in gumbos, soups and stews.
- It only requires 50 - 60 days to maturity and grows well in containers. Black containers help to keep the soil and root system warm.
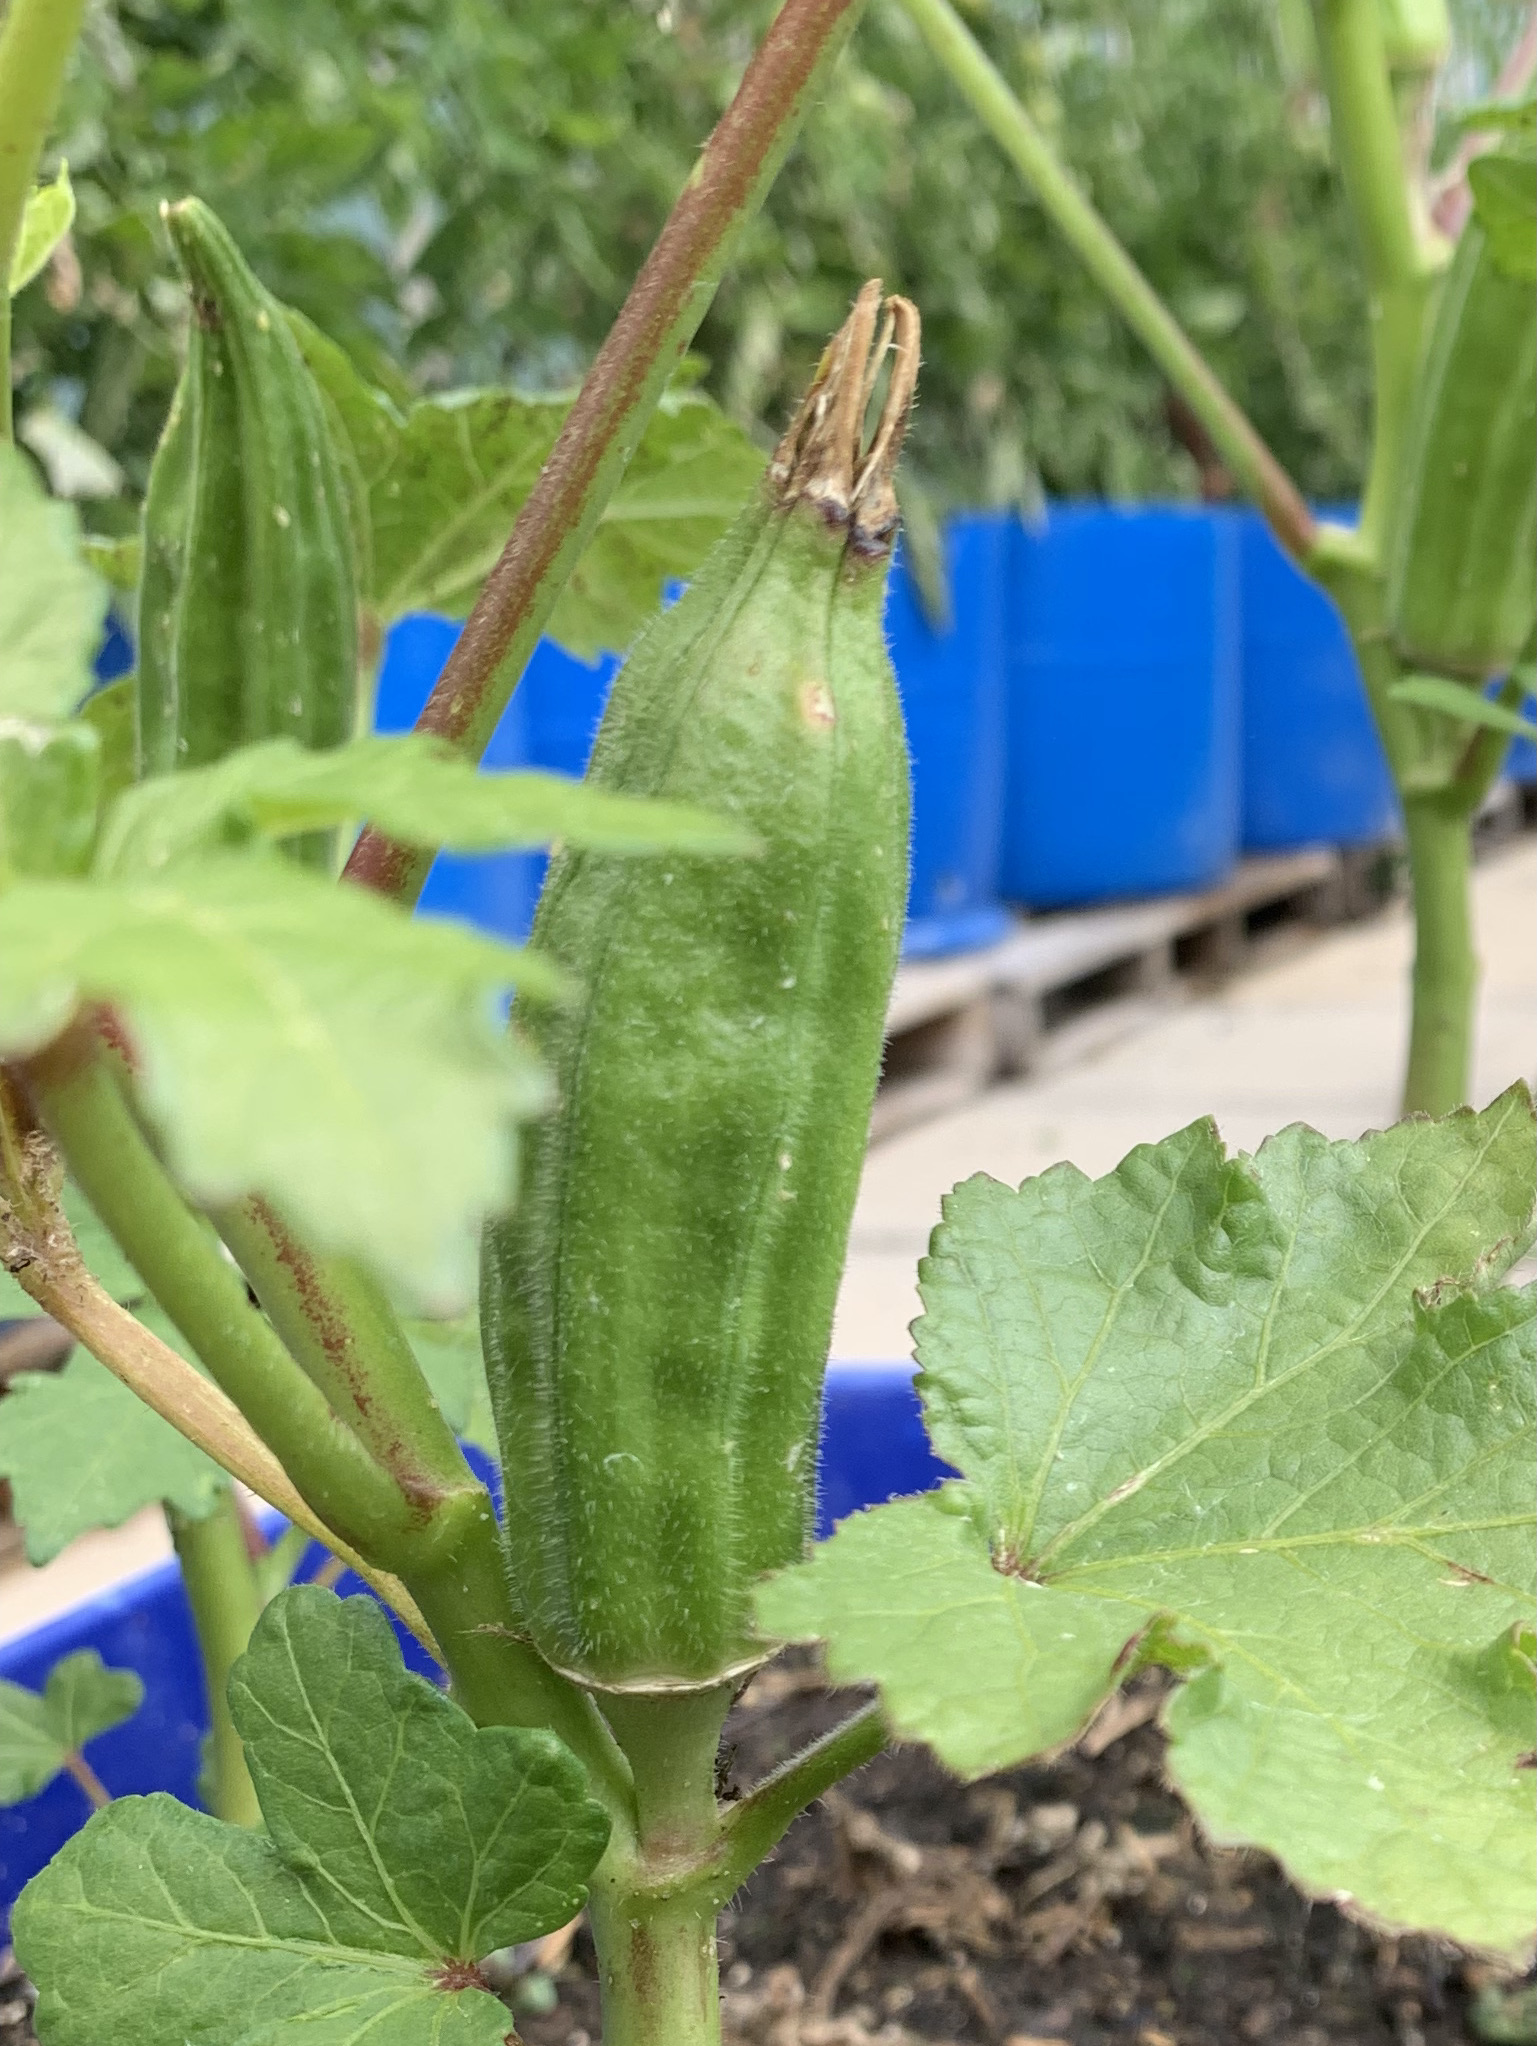
- Okra is grown for its tender, immature seed pods. Pods are ripe when they are 5 - 8 cm long (2" - 3") once the little hook on the tip of the pod is still flexible, before it turns hard and rigid. Young tender okra leaves are edible too and can be used in soups, stir fry or dehydrated as you would kale chips.
- Allow one or two of the pods reach full maturity on the plant in order to harvest them to plant the following year.
Okra is high in vitamins A, B6, and C, and thiamine, folate and fibre. Check here for detailed information from the USDA National Nutrient Database for Standard Reference.
The Canadian Food Guide recommends that roughly half of the food on your plate should be fruits and vegetables.

Growing outdoors
Click on the tabs above for more information!
Okra prefers sandy loam, loam or clay loam soils for good fruit production. Prepare the garden soil well in advance, adding organic matter and compost if needed. The soil should be of good tilth: soft, crumbly and easily worked. Consider growing okra as an edible ornamental in a flower border.
Okra also do well in containers filled with soil-less potting mix provided they are adequately fertilized.
Okra needs full sun for highest yields and are not suitable for partial shade or shady areas. If you have a partially shaded garden, you will be more successful if you grow them in a container in a sunnier spot.
While okra can be grown indoors, they typically do best outdoors. (See below for details)
Okra requires full sun and warm soil. A warm-season plant, okra only needs 50 - 60 days to maturity. Transplants are recommended for the prairies.
Okra can be direct seeded, either into a container (best) or in the garden (okay) provided that the soil is warm - at least 24-32°C or warmer. Seeds will rot at temperatures below 21°C. Direct seeding in the garden depends on weather.
Okra transplants can be grown indoors in your home or purchased from a local greenhouse.
Starting your own okra plants from seed
- Start transplants at about 2 - 3 weeks prior to planting out, ideally about two weeks after your last frost free date in spring. In Saskatoon, your frost free date is May 13 so start indoors around the middle of April.
- You can start okra indoors earlier, but they will quickly outgrow their pots. Be prepared to pot them into larger pots to ensure a healthy root system.
- The planting timeline can be shifted with season extending methods such as heating the soil and using water-based transplant sleeves like ‘Wall O’Water’®
- Sow seeds 0.5cm deep in a commercial soil-less media containing peat moss or coir with perlite and/or vermiculite. Soil-less media provides a disease-free environment as well as excellent drainage to minimize root disease problems.
- Okra can be slow to germinate, so soaking the seeds in lukewarm water overnight can help speed germination.
- Use flats, pots or containers with bottom drainage holes. At a soil media temperature of 24-32˚C, seeds will germinate in about a week. Seedling heating mats help to maintain warm soil temperatures for seed germination.
- Good lighting is crucial for the growth of healthy seedlings.
- Leave a fan blowing on your young seedlings as they grow to will help to grow heartier plants and to reduce some seedling diseases.
- For more details, check out our article on growing your own transplants.
The ideal okra seedling
- Sturdy and short, and dark green in colour.
- Has not yet flowered or set fruit.
- Has a good root system but is not root-bound (tight, hard ball of roots that do not break apart when gently massaged).
- Has a strong and sturdy stem. The internodes (spaces between leaves along the stem) will be small. Transplants that are too tall will tend to break and dry out more easily once planted out into the garden. Research has shown that stem diameter can be increased and height controlled by providing seedlings with constant air movement from an oscillating fan – or by lightly brushing seedling tops with a tea towel or stick at least 20 times daily.
Start fertilizing after the seedlings have their first true leaves. Wait a few days before fertilizing if you have transplanted your seedlings. Fertilize transplants two times/week using 20-20-20 water-soluble fertilizer. Mix according to label directions.
Okra transplants must be hardened off before transplanting outdoors.
Timing
- Okra can direct sown in a container or the garden outdoors.
- They can also be grown as transplants. See our transplants tab for tips on growing your own transplants.
- Okra plants are a warm season crop so they are very sensitive to cold temperatures and frost damage. Be prepared to protect plants with covers or blankets in the event of late spring/early summer frosts. It is best to transplant okra into the garden after all danger of frost has passed. The “average day of the last spring frost” in the Saskatoon area is typically May 13, but it's best to transplant 2 weeks after that date.
- These timelines can be shifted with season extending methods such as heating the soil and using water-based transplant sleeves like ‘Wall O’Water’®.
- Okra transplants must be hardened off before transplanting outdoors.
Direct sow instructions
- Sow seeds 1cm deep, with about 30-35 cm between plants, and in rows 60-90 cm apart in the garden. Wait at least two weeks after your last average spring frost date. Direct sowing in the garden depends on weather. If it is cool and wet, delay seeding as seeds will rot in cool, wet soils.
Planting instructions for transplants
- Gently massage the roots within the plug so that the roots will grow into the surrounding soil and not remain restricted within the ball.
- When planting, cover the entire transplant “plug” or seed ball with soil to prevent the plant from drying out. Exposed peat within the plug will act as a wick, drawing water away from the transplant and drying out the root ball.
- Ideally, transplant on a cool, cloudy day. Hot, windy days will easily desiccate tender transplants.
- Avoid planting into cooler soil.
- Pre-warm your soil in the garden by covering it with a sheet of clear plastic, secured at the edges for 2 weeks. Studies show that clear plastic warms soil better than black or other colours of plastic. Remove the plastic before planting.
- For extra protection for your newly planted okra transplants, place tin cans or milk cartons with the tops and bottom removed around plants and insert containers several centimeters into the soil. Not only does this provide some wind protection and increase soil temperature, but it may also discourage cut worms.
- Okra should spaced according to the instruction on the seed package, usually about 30 - 60 cm (12" - 24") apart. In ideal conditions in a hot sunny summer, okra can grow from 1 - 2 metres tall, depending on the variety. Avoid planting in a location where taller plants shade okra.
- Water-in the transplants with a starter fertilizer higher in phosphorous for good root growth (ex. 10-52-10) Mix according to label directions.
Don't forget to label what you planted. It's also helpful to draw a map or take a photo of your vegetable garden to help you track planting locations and success each year. This information is useful if you're rotating your crops to help prevent insect and disease issues. Okra belongs to the mallow family of plants.
- The optimal soil temperature for growth is 24-32°C, and seed rot will happen if you sow into soil below 21°C.
- Gardeners who want to get an early jump on the growing season, can warm up the soil with ‘Wall O’Water’®: a series of plastic tubes filled with water joined together to form a wall of water around the transplant. ‘Wall O’ Water’® can protect plants to -11˚C. Okra transplants could be planted out at least 2 weeks earlier on the Prairies provided the soil under the ‘Wall O’ Water’® has also been warmed.
- Okra are a ‘warm season crop’. This means they need warm temperatures and very sunny conditions for optimal growth. Okra benefits from planting in black, clear or dark green plastic mulch. The mulch increases soil temperature as well as conserving soil moisture and suppressing weed growth.
- Okra also benefit from supported crop covers throughout the season; the covers will warm the air surrounding the plants and encourage plants to flower, fruit and mature earlier than outside covers. Because most okra are self-pollinating, it is unnecessary to remove the crop covers during the growing season except to weed.
The selection of okra seeds is limited but here are some to try:
- Annie Oakley II Okra (48-50 days to maturity) Compact plant with tender, rich pods
- Jambalaya Okra (50-60 days to maturity) High yielding, shiny dark-green pods
- Lucky Green Okra (50-55 days to maturity) Vigorous and high yielding, dark green pods
Here are cultivar recommendations from the North Dakota State University Cultivar Trials, as they share a similar prairie climate and soils. You may download their list here:North Dakota State University Vegetable Cultivar Recommendations for 2021
-
Candle Fire, Clemson Spineless
The following cultivars are recommendations from the University of Saskatchewan vegetable program field trials;which were conducted from 1989 through 2016.
-
(no results for okra)
Okra benefits from a steady supply of soil moisture throughout the growing season.
Actively growing okra plants need 2.5 cm water/week. They also benefit from mulch, in the garden or in a pot.
Fertilize okra plants using a side dressing of compost. Another way is to use a granular fertilizer formulated for vegetables according to the manufacturers instructions. Okra grown in containers in soil less potting mix need regular fertilizing with a water soluble 20-20-20 fertilizer applied according to the manufacturers instructions - usually once or twice a week.
Avoid using high nitrogen fertilizers such as 32-0-0, which encourages leafy growth at the expense of fruit production.
Okra can also benefit from supported crop covers throughout the season; the covers will warm the air surrounding the plants and encourage plants to flower, fruit and mature earlier than outside covers. Because okra is self-pollinating, it is unnecessary to remove the cloth covers during the growing season except to weed.
Okra is not suitable for fall seeding.
Okra are a ‘warm season crop’. This means they need warm temperatures and very sunny conditions for optimal growth. Since okra needs only 50 to 60 days to maturity, it is a viable plant as long as soil temperatures are warm: the optimal soil temperature for growth is 24-32°C.
Okra should be planted out as transplants in the far north once the soil temperature has reached at least 21°C. Okra does very well in containers: black containers help to keep the soil and root system warm during the growing season.
Warm up the soil with ‘Wall O’Water’®: a series of plastic tubes filled with water joined together to form a wall of water around the transplant. ‘Wall O’ Water’® can protect plants to -11˚C. Okra transplants could be planted out around your last average spring frost date in the far north provided the soil under the ‘Wall O’ Water’® has also been warmed.
Okra benefits from planting in black, clear or dark green plastic mulch. The mulch increases soil temperature as well as conserving soil moisture and suppressing weed growth.
Okra also benefit from supported crop covers throughout the season; the covers will warm the air surrounding the plants and encourage plants to flower, fruit and mature earlier than outside covers. Because most okra are self-pollinating, it is unnecessary to remove the crop covers during the growing season except to weed.
See our preservation section for more videos.
Growing in containers
Click on the tabs above for more information!
Okra can be grown in a container indoors or outdoors.
Plant a single okra transplant in a large container with a hole in the bottom. If seeding into the pot, plant 2 or 3 seeds and then thin to the strongest seedling. The container should be at least 8 liters (2 gallons) or larger to allow space for a healthy root system.
We had excellent success growing okra in black containers in the USask Rooftop Vegetable garden. Black containers keep the soil and root system warm.
See: Vegetable container gardening
Okra can be grown indoors but need supplemental lighting.
See our Growing indoors page for detailed growing advice.
See the recommended cultivars list under the outdoor growing tab. Any of those would work well in a container.
Saving seeds
Click on the tabs above for more information!
Seeds are expected to be shelf-stable for one year from date of sale if purchased from a reputable retailer. If you wish to save your seeds beyond that, you should store them in the fridge in a jar. Seeds lose viability quickly if they dry out too much or get too warm.
The life expectancy of okra seed stored under favourable conditions is between 1 to 3 years.
Seeds stored under less favourable conditions will show poor germination after just a single year of storage. Beyond this, you can expect your germination rates to go down (ie. not all of your seeds will grow, but some might). To test your seeds, you can do a simple germination test. Follow the link for instructions. If you are still getting some seeds germinating, seed more thickly and thin any extra.
Okra seeds can be saved from “heritage” or “open-pollinated” plants. If the plant tag or seed package from the original plant says “hybrid”, the plants grown from seeds collected from hybrid plants won't look the same next year.
The okra pods emerge from each pollinated flower, and will mature if left on the plant to produce seeds for planting the following year. Allow one or two pods to fully mature toward the end of the growing season. If you let seed pods mature too early in the growing season, the plant will not produce as many flowers for continued harvest.
Harvest pods once they turn brown and begin to split open, and remove the seeds from the pods. Spread the seeds on a plate or tray in a warm, dry location and allow them to dry completely, which can take a week or more depending on temperature and humidity levels.
How to store seeds
Vegetable seeds can keep for several years if you store them properly. Seeds should be stored in a cool, dry, dark place. Moisture, heat and light can cause seeds to sprout or rot.
- Place your seeds in envelopes or make your own envelopes out of foil or waxed paper. Label with name of the seeds and the date (month and year) you harvested them.
- Place your envelopes inside an airtight container. To help keep seeds dry, place about a tablespoon of dry powdered milk in a paper towel or piece of cloth, secured with a twist tie or piece of string. The powdered milk will absorb humidity and keep seeds dry inside the airtight container.
- Put the container in the refrigerator. Do not store seeds in an unheated shed or garage. These places are either too moist and/or too cold for seed storage.
Harvest
- Harvest okra early in the day before temperatures rise.
-
Harvest by cutting or snapping the pods off when they are about 5 - 8 cm (2-3") long. One trick is to press on the little hook at the tip of the pod. If it is flexible without breaking, then your okra is ripe and ready for harvest.
-
Once that hook loses flexibility and becomes rigid the okra pods are overripe and inedible, and the best thing to do is let it mature on the plant and harvest the seeds for next year.
- Keep picking immature pods throughout the season. The plant will continue to flower and produce new pods.
Harvest the pods by cutting the stem with a knife or scissors.
Storage
-
Okra is best eaten fresh. Refrigerate unwashed, dry okra pods in perforated plastic bags in the vegetable crisper. Do not wash them as wet pods quickly become moldy and slimy. Okra keeps fresh for only two to three days.
Okra can be frozen, dehydrated, or canned.
For long term storage of okra pods, freezing is your best option. Always blanche okra before freezing or it will quickly become tough and lose many of its nutrients. Blanche fresh green pods by bringing a large pot filled with water to a rolling boil. Wash and trim stems off the okra pods before dropping them into boiling water. Cover the pot with a lid. Blanch for four minutes and then remove the okra and place it immediately into an ice water bath for another five minutes. Remove from ice bath, pat dry, and pack them into prepared freezer bags. Blanched okra can remain frozen for up to one year.
Okra leaves can be dehydrated as you would kale chips.
Cooking and preserving
Click on the tabs above for more information!
The immature seed pods of okra are the most common way to eat this plant. The pods have a “mucilaginous” texture which can feel gooey when cooked. This quality helps to thicken traditional stews such as gumbo. To minimize this goey mouthfeel, keep okra in larger pieces in soups and stews, and cook okra at high heat for a short duration in dishes such as stir fry.
Okra leaves are edible too. Young tender leaves are best and can be eaten raw or cooked.
Loading...

Troubleshooting
Click on the tabs above for more information!
Okra require care, especially when it comes to water and temperature. Keep okra evenly moist (but not sitting in water) for general health. Managing their needs for water, light and soil helps okra to be more resilient and resist insect and disease problems. Most years, the primary issue with okra is cool temperatures, frost or inconsistent watering.
The most common insect problem for okra is: Aphids.
See the Common problems tab on this page for advice on other specific okra issues.
Common questions
Research and student activities
Click on the tabs above for more information!