Getting Started
Welcome to the wide, wonderful, and often wacky world of cannabis cultivation! Growing your own cannabis is an excellent choice for many reasons:
- Growing and producing your own is nearly always cheaper than buying from a store.
- The quality and consistency can be much better with proper growing and handling techniques.
- You choose the inputs and have complete control over what is used (and not used) to grow and protect your plants.
- You gain cannabis autonomy - no longer have to rely on anyone for your cannabis.
- It can be very therapeutic. Gardening in general has been shown to have many benefits beyond food production, and growing cannabis is no different!
This page and the associated articles are intended as a basic introduction and guide to personal home cultivation of cannabis in Saskatchewan. There are many books, guides, and tutorials available and while they may have good information, it is often blended with myths and falsehoods that have come to be thought of as “common sense” in the cannabis growing world (aka “Bro-Science”). Cannabis growers can be very passionate (and possibly dogmatic) when it comes to what they believe is “the best”. The information in this guide is based on relevant peer reviewed research (when available), traditional horticultural practices (aka gardening), as well as the author’s personal experiences growing cannabis in Saskatchewan for the past 15 years (as of 2026).
Coming soon!
This guide is intended for residents of Canada where, as of October 17, 2018 under the Cannabis Act, it is legal for adults who are 18 years of age or older to grow, from licensed seed or seedlings, up to four cannabis plants per residence for personal use, subject to provincial or territorial restrictions. In Saskatchewan, under the Residential Tenancies Amendment Act, landlords may impose reasonable rules prohibiting the growth of cannabis in a rental unit, and condominium boards also have the ability to pass bylaws respecting the cultivation of cannabis in their complexes. Always ensure you are aware of and follow your local laws. This guide is provided for informational purposes only and is not legal advice.
The Basics
Cannabis is an annual flowering herbaceous plant. Being an annual, this means it grows for one season, flowers, produces seeds (if pollinated), and dies. Its seeds, if available, grow to be next season’s plants, continuing the cycle as long as new seeds are produced. Cannabis is primarily wind pollinated.
Cannabis is mostly dioecious, which means it has separate male and female plants. Only the female plants produce resin which contains the active ingredients - cannabinoids like THC and CBD, terpenes, and many other important compounds. Female plants will also produce seeds if pollinated. Male plants produce pollen and unless seeds are desired, are always removed from the growing area. Males also tend to mature earlier than females and do not usually produce resin.
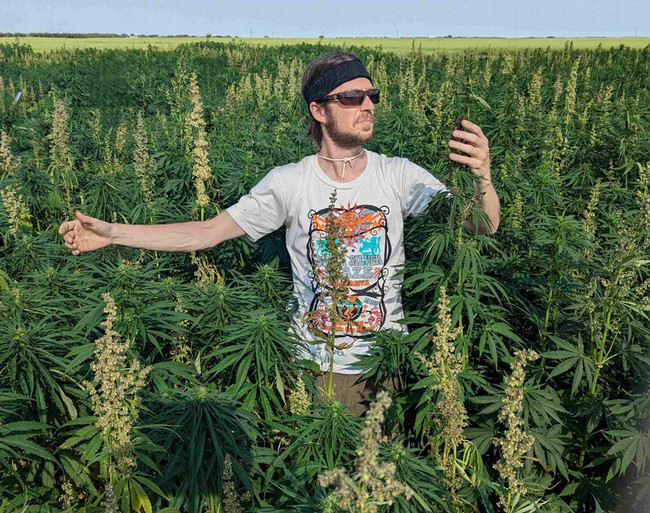
Cannabis can also be monoecious, which means it has both male and female flowers on the same plant, and thus can pollinate itself. These plants produce a low to moderate amount of resin, and have uniform maturity times, and so are mainly grown for seed and/or fibre production. Many of the hemp fields in Saskatchewan are growing this type of plant.
Cannabis is (mostly) a short-day plant. This means that to start flowering, it requires approximately 12 hours (or more) of uninterrupted darkness. Here in Saskatchewan, this only begins to occur around the beginning to middle of September and so makes growing cannabis outdoors under natural conditions challenging. However as with most things, there is an exception. Some cannabis plants will begin to flower regardless of the amount of darkness or light. These plants are “day-neutral” and are commonly known as “autoflowers”. They grow until a certain age, after which they begin to flower “automatically” (hence the name). These types of plants do very well outdoors in our short Saskatchewan growing season.
Cannabis has a vast number of varieties and cultivars (often called strains) with different smells, flavours, and effects. Their growth habit and morphology (i.e., the way they grow and the physical shape and form of the plant) is also highly variable. Some plants are relative dwarfs growing no more than a few feet tall while others can be taller than some trees! This difference is often described as “indica” and “sativa”, respectively. This is somewhat reductive as it is not quite this simple, but for the intents and purposes of this guide, it is enough to know that plants vary greatly in height, shape, smell, and effect based on their genetics.
The closest relative of Cannabis is Hops (Humulus sp.), which is also dioecious (separate male and female plants). They are in the same family (Cannabaceae) and are effectively cousins – they diverged from a common ancestor approximately 21-30 million years ago but still share many characteristics. Female hops cones produce many of the same essential oils and terpenes as cannabis – give them a squeeze and a smell next time you see one! This is why they are used in the brewing industry to impart different flavours in beer. Some people say that cannabis can even be grafted onto a hops vine. While the author hasn't yet attempted this, it would be very interesting to see!
Cannabinoids are the main active ingredients found in cannabis, including tetrahydrocannabinol (THC), cannabidiol (CBD), cannabigerol (CBG), and others. These compounds, classified as secondary metabolites, are largely responsible for the physiological and psychoactive effects associated with cannabis.
To date, over 180 different cannabinoids have been identified, but the specific roles of most of them have yet to be determined. The primary reason the plant produces these compounds, along with many others, is for self-defense. In nature, they help deter predators such as insects and animals from consuming the flowers and leaves. Cannabinoids tend to have an unpleasant taste and are very sticky, making them unappealing to many organisms.
Other plants use similar defensive strategies. For example, hot peppers produce capsaicin to discourage predators from damaging their fruit. However, just as humans have learned to cultivate peppers for their desirable compounds, cannabis has also been selectively cultivated to maximize the production of cannabinoids. These compounds can occur in a variety of ratios and combinations within the plant. The most common cannabinoids are briefly discussed below.
THC (Delta-9-Tetrahydrocannabinol)
THC is the most well-known and extensively studied cannabinoid. It is primarily responsible for the "high" associated with cannabis use. THC is typically the dominant cannabinoid in most commercial cannabis products and is often used as a measure of quality, with higher THC content frequently being associated with higher-quality cannabis.
However, higher THC levels do not always translate to stronger or better effects. The cannabis experience is highly subjective and is influenced by many other compounds present in the plant.
CBD (Cannabidiol)
CBD is the second most common cannabinoid found in commercially available cannabis. Certain varieties, such as industrial hemp, are CBD-dominant and contain very little THC. CBD is much less psychoactive than THC and is believed to moderate some of THC's effects.
CBG (Cannabigerol)
CBG is often referred to as the "mother cannabinoid" because all major cannabinoids are derived from its precursor form. It can be thought of as the "stem cell" cannabinoid because, depending on which biochemical pathway it follows, it can be converted into other cannabinoids such as THC, CBD, or CBC (cannabichromene). Although relatively uncommon, some cannabis varieties have been selectively bred to produce high levels of CBG. CBG is generally considered to be significantly less psychoactive than THC.
CBN (Cannabinol)
CBN is a secondary cannabinoid formed through the degradation of THC. Cannabis plants do not produce CBN directly as a primary cannabinoid. As THC is exposed to heat, light, and oxygen over time, it gradually converts into CBN. CBN is generally much less psychoactive than THC. Because it is not economical to extract in large quantities from naturally aged cannabis, many CBN-containing products on the market likely contain synthetically produced cannabinol.
Terpenes
Cannabinoids are not the only compounds present in cannabis resin. Many other compounds contribute to and modulate the overall experience. Among these, terpenes are especially important because they play a major role in the plant's aroma and flavor profile and may also interact with cannabinoids and their effects.
There are hundreds of different terpenes, many of which are highly aromatic. In combination with other volatile compounds, such as sulfur compounds, ketones, and alcohols, terpenes are responsible for the distinctive scent profiles of different cannabis varieties.
Terpenes are also found throughout the plant kingdom and are major contributors to the aromas of many other plants. For example, linalool contributes to the scent of lavender, while pinene is characteristic of conifer trees. The three most common terpenes found in commercial cannabis are limonene (citrus-like lemon and lime aromas), myrcene (musky and earthy aromas), and caryophyllene (peppery aromas).
One of the most common (and confusing) ways to describe and differentiate cannabis is using the terms “indica” and “sativa”. You can almost be guaranteed to be greeted with “What are you looking for: indica or sativa?” by most budtenders. Seeds are almost always labelled with the alleged ratio of indica to sativa, but what does this really mean, if anything at all?
For the intents and purposes of this article and our associated growing guides, the differentiation will be based on physical generalizations as well as the typical grower/consumer experience and what you may encounter both when purchasing materials to grow cannabis (i.e., seeds or clones) and/or cannabis itself. Keep in mind these are very large generalizations and not exact definitions as the lines between the two can often be very hazy (pun intended).
Indica
This type of plant is traditionally short and squat featuring large, wide leaves and leaflets and it has a relatively short maturity time, typically between 8 and 10 weeks. The buds are often very dense. Typical odour profiles can be (but are not limited to) acrid, skunky, fruity berry, fuel, rubber, and earthy. Most seeds available in stores are crosses and hybrids of this type.
Sativa
These plants are usually very tall and lanky with many side branches and large thin leaves with thin leaflets. Typical maturity times tend to be quite long, usually ranging between 12 to longer than 20 weeks in some exotic varieties. They often get very tall and can be difficult to manage indoors. Sativa buds are often less dense and ‘airy’ as they tend not to grow in as tight of clusters as indicas. Common odour profile encountered are citrus, herbal, tropical fruit, or cat urine. ‘True’ sativas are fairly rare in the market, both as flower and as seeds to purchase, due to their relative difficulty in cultivation and longer flowering time.
Something you will likely run into when looking for cannabis seeds will be the terms ‘regular’ and ‘feminized’. These terms are not used with any other types of flowers, fruit, or vegetable seeds and can be confusing. So, what is the difference?
Regular seeds are simply seeds that produce both male and female plants. Cannabis is naturally dioecious, which means it has separate male and female reproductive organs (stigma and stamen) on individual plants. This is unlike tomatoes, for example, which have both stigma and stamen on the same plant, and in the same flower. This was the only type of seed available until the 1990s when "feminized" seeds became widely available, and so were simply known as seeds. Denoting them as "Regular" was done to be able to differentiate them from the new feminized seeds. The liklihood of getting either a male or female are roughly equal – there is about a 50/50 chance of getting either gender with each seed. This is great if you are interested in making more seeds but can take up valuable time and space if not.
So then, what are feminized seeds? You may have guessed based on the name: these are seeds that will produce female plants. They are produced by chemically inducing a female cannabis plant to produce male flowers instead, which produce pollen. This pollen, having been produced by a female plant, contains only female sex chromosomes, and so when it is used to pollinate another female plant it contributes only female genetic information, resulting in an all-female population of offspring (i.e., seeds). These seeds can now be called "feminized" and should produce only female plants (some exceptions occasionally occur but are rare). Using this type of seed is a great way to bypass the initial step of identifying and removing males, potentially saving time and resources.
Gardener’s Note: Even though the ‘feminization’ is chemically induced, the seeds produced are completely natural, normal, and safe to use. This technique is also commonly used with other dioecious plants such as cucumbers, asparagus, and spinach.
Which type is right for you?
This all depends on your goals and what is ultimately available for you to use. Neither type is better or worse than the other (assuming they were properly made), just different.
Regular seeds generally have more genetic variety as they are much easier and cheaper to make, and usually cheaper to purchase. They require an extra step in the beginning of the grow as most growers do not want males and so need to remove them as soon as they can be identified. This makes maximizing your four-plant limit tricky if you must get rid of a male or two (or three!). This can sometimes be frustrating as it generally takes approximately 4 weeks to make a positive gender identification (without using lab testing).
Feminized seeds, as mentioned, will produce only female plants. This is very useful, especially with our four-plant limit, as you don’t have to worry about composting your males and having to start over and try again to get a female plant. This is the most significant benefit to using feminized seeds as it can save a lot of time and resources. One downside is that you won’t find as much genetic diversity or variety in your options due to the expense and work required to produce them. Making feminized seeds on a large scale can be expensive, and isn’t always successful (i.e., sometimes plants produce non-viable pollen, or no pollen at all). For this reason, feminized seeds also tend to cost more than regular seeds.
Gardener’s Note: It is impossible to visually determine whether a regular seed will produce a male or female plant!
Cannabis is an interesting plant in that it has two “sub-types” when it comes how and when it begins to produce flowers. Both types can produce excellent quality flower but it’s important to know what kind of plants you will be growing to avoid issues and maximize the efficiency and enjoyment of your garden.
Photoperiod-dependent (short-day) type
Photoperiod-dependent plants (also known as “short-day plants”) require a critical amount of uninterrupted darkness, about 12 hours, to begin flowering. Because of our latitude, we have long days and short nights during the summer, and so this critical amount of darkness only occurs in early September. This can present a problem when growing photoperiod-dependent plants outdoors as the flowering stage requires at least 8 weeks to produce ripe, mature buds (and often longer). Here in Saskatchewan, this puts us into November, with snow being likely and frost being certain. There are ways to artificially induce flowering early, such as using blackout curtains on a greenhouse (aka “pulling tarps”), but this requires much effort and work and is not advised for new growers. Growing indoors gives you control over the amount of light and darkness your plants receive. Simply change your light timer from the standard vegetative schedule of 18 hours light/6 hours darkness (18/6) to 12 hours light/12 hours darkness (12/12) when your plants are ready. This is beneficial as you are in complete control of how small or large you want your plants to be, as well as provides time prior to flowering for training and manipulating the plants as needed.
One large benefit of using photoperiod-dependent plants is that they are able to be cloned. Cuttings can be taken at any time during the vegetative stage, and if rooted, will produce genetically identical plants (clones) to be grown again (and again, and again…). This is how some plants are kept “alive” indefinitely. If you find a plant you like, it is recommended to make clones as it is very unlikely you will get another identical plant if growing from seed, even if it is from the same batch.
Gardener’s Note: Chrysanthemums are another example of a short-day plant. If you have ever tried (and not succeeded) to get your mum to bloom during summer here in Saskatchewan, this is why!
Autoflowering (day-neutral) type
The other type of plant you will come across is known as autoflowering (or day-neutral). This type of plant begins to flower based on age and/or maturity, instead of the length of darkness. This can be beneficial, especially when growing outdoors here in Saskatchewan. Many auto-flower type plants are ready to harvest in 70-90 days, which is perfect for our short but intense growing season. Plant in late May to early June and be ready to harvest in late august-early September. Autoflowering plants also do well indoors and can be grown under any light schedule, though 18/6 is recommended for maximum photosynthesis.
The autoflowering trait itself is thought to have been derived from plants that naturally evolved in harsh, northern regions of Asia where the growing season is similar to ours – short but with long days. Plants could not afford to wait until the day-length naturally shortened, so they had to adapt and so became day-neutral. This was to be able to reproduce with enough time to make viable offspring (seeds) before the harsh winter. These plants tend to be very small and produce very little resin, hence the often-used epithet, ruderalis. Only relatively recently have people began to cross these dwarf auto-flowering types with photoperiod-types and so autoflowering cannabis as we know it today is relatively new.
Understanding what type of plant you will be growing will make a big difference in the way you set up your garden, the biggest factor being whether you need to have control over the light cycle for your plants. If you are unable to guarantee at least 12 hours of uninterrupted darkness, auto-flowering type plants are the best choice. If you can control your light and dark periods, you can use either type.
Gardener’s Note: All the industrial hemp you see in the fields here in Saskatchewan are auto-flowering plants! Other examples of day-neutral plants include tomatoes, peppers, or impatiens. Once they start flowering, they don’t stop!
Equipment
Now that you have decided to grow some cannabis, the first question that needs to be addressed is "where"? Cannabis growers are notoriously creative – if there is free space it is likely that someone, somewhere has tried to grow some plants there.
So, will it be indoors or outdoors? Both methods have advantages and disadvantages, but whichever you choose, there important nuances to consider. Read our article about the pros and cons of each method for more details!
If growing outdoors, cannabis can basically be treated like tomatoes. It does best in full sun and enjoys a fertile, well drained soil with good amounts of organic matter. If you already have a well-maintained garden plot or raised bed, this would be an ideal spot for a few cannabis plants. You can also use containers with a potting soil-based medium. This has benefits as the containers can be moved around if needed.One potential downside is the lack of control over your environment (weather, insects, etc.).
Growing cannabis indoors gives you a lot more control over your environment. You are the master of temperature, light schedule, watering, feeding, etc. Two important considerations when thinking about your growing area are “can the space be kept dark for 12 uninterrupted hours?” and “Do I care about the smell?”. A spare room can work well for a small garden, assuming it’s convenient to use. If you decide to use a room, be aware that cannabis is a very fragrant plant and will be very noticeable if proper ventilation and/or filtration is not used.
Dedicated grow tents are probably the best option for the average indoor grower. They are made of canvas material, have ventilation holes built in, and are lined internally with highly reflective walls to maximize the light efficiency. They come in various sizes depending on the grower’s needs and essentially create a “room within a room”. This allows for excellent control over your environment, as well as the ability to control odours using an activated carbon filter.
Tents should be located near a power outlet, have adequate space for ventilation, and always be accessible. For the average Canadian growing four plants, a modest 2’ x 4’ x 5’ (60cm x 120cm x 150cm) tent is often more than adequate. These can often be purchased at garden stores as well as online.
Gardener’s Note: If you still have space left over in your tent, you can always grow other plants to utilize the space! Hot peppers or herbs are great choices!
Plants need light to provide the energy required to power photosynthesis. The more photosynthesis, the more vigorously the plant can grow. Light quality and quantity are probably the most important factor in maximizing the potential of your grow. If a plant is not getting enough light, it doesn’t matter how good your soil is or how much fertilizer you give it, it will not perform as well as it could have. Cannabis enjoys moderate to high amounts of light, compared to something like lettuce. Depending on where you decide to grow (indoors or outdoors), your light will come from very different sources.
If you choose to grow outdoors, the sun will be your light source. Fortunately for us, Saskatoon has some of the sunniest weather in Canada – perfect for growing light-loving plants like cannabis. This is ideal as the sun is the absolute best quality light for growing plants that we know of. Make sure that the location you choose for your plants has as much sun exposure as possible – south-facing areas without too much shade are ideal.
Indoor lighting can be quite a bit more complex, especially within the cannabis world. There are lots of options and even more opinions on best practices, and every company claims to be the next best thing to the sun (pun intended). There are various types of lighting technologies (LED, high pressure sodium, metal halide, etc.) but no matter what type of light you choose there are some basic but universal things that should be considered, with adequate coverage and light intensity being the most important. See our article on the different types of indoor lighting options and best practices for an extensive look at indoor lighting.
Growth medium is simply the type of material you will use to grow your plants in. Some examples are peat, coco coir, soil, and rockwool. The type of medium you decide to use to grow your cannabis will depend on a few key factors and each comes with its own pros and cons.
If you are growing outdoors, the choice will be between growing directly in the ground in soil or growing in containers using soilless media (like potting soil). Growing directly in soil is always preferable, assuming your soil is healthy and your garden is in an appropriate spot. It is likely the cheapest, and your plants will benefit from the soil-plant-microbe interactions. Cannabis prefers loamy soils with good drainage, rich in organic matter, and a neutral to slightly acidic pH for maximum nutrient availability.
If using containers either indoors or outdoors, any standard potting soil mix will work. Potting soils and other soilless media will require regular fertilization as they do not contain significant amounts of nutrients. Coco coir and peat-based medias are very popular choices and are recyclable/compostable, though peat can be an issue in terms of environmental ethics. Garden soil or other soils sourced from outdoor areas are not recommended for container growing. They tend to be too dense and often do not drain well when used in a container. Check out our in-depth article about the different types of soilless medias for help deciding what will work best for you!
Gardener's Note: Another option is to grow without any media at all (aka hydroponics). This is a very viable and often used method, however, as the author has limited experience in growing with and using hydroponic systems, it will not be discussed in detail.
Like all plants, cannabis needs nutrients to be able to grow and be healthy. Where these nutrients come from can vary depending on the growing environment and preferences of the gardener. Cannabis will grow great using most balanced, complete fertilizers, though there are a few considerations to be aware of.
No matter whether you are growing indoors or outdoors, the feeding regimen is generally the same for most types of cannabis. Though seedlings require very low amounts of food, phosphorus and nitrogen are used in the growth and development of roots and foliage, respectively, and so it is important to make sure there are adequate amounts of these nutrients in the early stages. During vegetative growth, growth is at it’s peak, and so nitrogen tends to be used in large amounts. Once flowering has been initiated, less nitrogen is required, with phosphorus and potassium requirements increasing. This progression is similar to many plants where high nitrogen for fast, vigorous growth is promoted in the early stages, with an increase in phosphorus needs later during flowering and/or fruit production. Details on the different growth stages of cannabis and their specific fertilizer preferences can be found below in the various “Cannabis Life Cycle” sections.
Depending on who you ask, some growers are adamant that cannabis grown with “natural, organic” fertilizers is superior, allegedly boasting better flavours and being “cleaner” than flower grown using synthetic, salt-based fertilizers. These opinions are mostly subjective speculation with little to no data to back up the claims. What you decide to use will be based on your personal beliefs and ethics and, ultimately, what is locally available and economical for you to use. Here at Gardening at USask, we encourage the use of products that are both effective and environmentally friendly/sustainable in terms of production practices and long-term soil health.
Check out the links below for a list of organic and naturally derived fertilizer options and for information and advice in selecting something that works for you!
Choosing a container or pot for your plant is fairly straightforward but there are some important factors to consider.
Size
Size of the container generally controls the size of the plant. The old gardener’s saying “the bigger the roots, the bigger the shoots and fruits” is quite literally true as plants with larger rhizosphere (root-zone) generally perform better in terms of plant size and overall yields.
For cannabis, if you are growing in containers outdoors in Saskatchewan using autoflowering genetics, no smaller than 20L (5 gallons) is recommended. A standard round pail works well - make sure to drill drainage holes. Containers larger than 40L (10 gallons) may not be fully utilized by most autoflower genetics in our short growing season and so smaller sized pots may be more economical. If you are growing photoperiod type plants, a larger sized pot may be more applicable, depending how large the plant will be. Growers in more southern latitudes who grow very large plants use very large pots – even as large as 200 gallons (757 L)!
Container size when growing indoors will be influenced by the size of your growing area and how large you intend to grow your plants. Three to four gallon (12L - 16L) containers are the author’s preferred pot size growing indoors. These provide enough root space for a good-sized plant to flourish without getting too large and becoming unruly both above and below the soil. Larger sizes can be used if a longer vegetative period is desired. This can be beneficial if you want to grow fewer plants but have them get very large. As long as the canopy is full, it doesn’t matter if it is one large plant or four smaller plants. If large plants are not desired, it is possible to grow in smaller containers as well. The author has successfully harvested excellent quality cannabis from ~500mL containers, with even smaller being possible. These are dubbed “Micro-Grows” and are an excellent option for the casual user and/or grower.
Type
The type of pot you use and the material it is made from can have a big impact on plant health as well as the amount of work involved. Standard practice is to use some sort of plastic-based pot. These are cheap, available, plentiful, and reusable. Reusing plastic pails is a great option – just remember to make some drainage holes in the bottoms. Fabric pots are another option. These allow air in through all sides of the pots allowing for “air pruning” of the roots, which can reduce the amount of girdling in the rootzone. Soil in fabric pots tends to dry out much faster than in plastic, requiring more frequent watering.
Shape
The shape of the container is important for multiple, unrelated reasons. Some plants have shallow, sprawling rootzones, while others tend to dig deeper with a central taproot. Cannabis tends to have a combination of both, leaning more towards a more fibrous style when grown in containers. Using containers that are slightly deeper than they are wide is a good general rule of thumb. Another consideration is round or square containers. Square containers are much better for side-by-side growing as there is no wasted space between them, unlike with round containers. If floor space is an issue, square containers may be a better choice. The author has found no difference in plant health or quality when using either round or square containers.
Container Colour
Colour is most important to consider when growing outdoors using containers. Dark coloured pots absorb a lot more heat from the sun than light coloured pots. This can cause high temperatures in the root zone which can be detrimental to plant health. Light coloured, opaque (light does not pass through) containers are best for outdoor growing. Indoors this is much less important as the pots do not heat up, and so any colour will work equally well.
Whether growing indoors or outdoors, you are going to need to irrigate your plants, and so it is important to have a reliable source of water in or near your growing area. It is no fun hauling large amounts of water around and can make growing cannabis (or any plants) feel more like a chore than something enjoyable. Collecting and using rainwater is the best option, but may not be practical if growing indoors, especially during the winter. Access to a tap with a large enough space to fill your watering can or jug is highly recommended.
Each stage of growth has different watering requirements, and each plant will be slightly variable in its water needs. If growing outdoors in the soil, aim for approximately 2.5cm (1 inch) of water per week. If growing in containers, whether indoors or outdoors, it will depend on the size of the plant and the size of the container. A good rule of thumb is when the pot weighs half as much as when it is fully watered, it is time to irrigate! Whether indoors or outdoors, slow, deep, and even watering is ideal. This allows the water to percolate and saturate the soil evenly and fully. Keeping your soil or other media damp to moist (but not soaking wet) is the best way to ensure happy plants.
Water quality is also important. The source of your water should be considered, whether from a well, from a river, or from the sky (aka rain). Rainwater is ideal, as it should be clean and relatively pure. And it’s free! Much of the tap water in central and southern Saskatchewan tends to be relatively alkaline (pH higher than 7) and can contain high amounts of dissolved solids which can vary with the seasons. These dissolved solids are what causes white. chalky build-up in your faucets and showers. Having high amounts of these minerals in your water can cause issues with plant health and nutrient uptake, especially when used in a small, mostly closed and controlled environment like a container. Most plants grow best with water/soil pH of 6.0-7.0, and relatively low amounts of dissolved solids (less than 200 is ideal). If needed, water can be filtered or treated to ensure proper plant uptake and avoid problems.
For a more comprehensive look into water, water quality, and other irrigation-related topics, check out our article.
HVAC stands for Heating, Ventilation and Cooling. It is an occasionally overlooked but very important part of growing cannabis, for multiple reasons. Proper air circulation provides plants with fresh air to breathe while removing (and possibly filtering) the hot, moist, and smelly air.
Outdoors
Outdoors, HVAC is mostly left up to Mother Nature. There is not a lot we as humans can do about the weather, and so we hope that the season will be conducive for healthy and consistent growth. Standard horticultural practices like planting near a fence or other barrier can help to alleviate strong winds, and shade cloths can be used to help mitigate high temperatures.
Indoors
Indoors, proper ventilation is extremely important. Whether you are growing in a room or in a tent, you are going to need effective air circulation and potentially filtration due to the strong smell. Lights generate a lot of heat and plants release a lot of water vapour and are very pungent, and so proper air circulation and ventilation are important to keep the garden happy and healthy. Most gardeners use a combination of an inline fan with a carbon filter to clean and vent the air. Check out our article on Indoor Ventilation and Filtration for a more detailed look into why ventilation is important and how to set it up.
Most people's houses are already at an ideal temperature for growing a few cannabis plants. If is comfortable for you, it is usually also a good temperature for your plants.
Seeds
For most new cannabis growers, seeds will be the most likely way you will start your growing journey. They are straightforward and if you garden, you are already likely very familiar with using and planting seeds. They are available at many retail stores for purchase, as well as are able to be given and received in the same manner as cannabis flower (according to the Cannabis Act, 1 seed = 1 g). Many growers are happy to share, especially if they make them themselves.
Seeds come as “regular” (produces both male and female plants) or “feminized” (produces only female plants), and as photoperiod (light cycle dependant) or auto-flowering (day-neutral or light cycle independent). For more information on these sub-types, see the tab in the section above. These traits are independent of each other and so all seeds will be combinations of:
- Regular + photoperiod
- Feminized + photoperiod
- Regular + autoflower
- Feminized + autoflower
Regular seeds have a 50/50 chance of being either male or female. It is impossible to know if it will a male or female plant just by looking at the seed! Most growers are not interested in making more seeds, and so males are usually discarded as soon as they are identified. Only the female plants produce the type of flower that we want as consumers. Males also produce flowers but do not produce resin and are only useful if making more seeds and/or breeding is the goal. Using feminized seeds bypasses this initial selection step, ensuring only female plants are grown. These seeds are produced using a technique commonly called “reversal” by cannabis growers – a female plant is induced to grow male flowers, producing viable pollen that is used to pollinate a separate female plant, creating a female-only seed population.
Photoperiod-type plants require 12 hours of uninterrupted darkness to flower, while autoflowering-types will flower under any light regime. These differences are discussed in more detail above in the tabs in the previous section.
So, with all this in mind, make sure you have the right type of seeds and plants for your goals. Below are recommendations for growing in Saskatchewan:
- Growing outdoors – use feminized or regular autoflowering
- Growing indoors – use any type
Clones (asexual propagation)
A clone is an asexually propagated plant, usually from a stem cutting that produced roots and then was planted. Clones are usually much more straightforward to use in that they have already been selected for sex (always female except in special cases), as well as specific traits that you or another grower deemed worthy of preserving such as smell, effects, potency, aesthetics, growth habit, etc. If you know you like a specific variety and want to maintain a consistent supply, using clones is the best way to achieve this. They are genetically identical to the plant they were cut from and so have the potential to produce the same qualities grow after grow.
Clones are generally harder to find for purchase than seeds in Canada. Growers often trade amongst themselves but can be very protective of certain plants, depending on their personal situation and goals. They are occasionally available from retail dispensaries, but due to challenges in keeping them fresh during shipping and storage, as well as the relative lack of demand, they are still difficult to source reliably, especially in Saskatchewan.
One other important downside of using clones is that they have the potential to bring in unwanted pests or diseases into your garden. This is especially important if growing indoors as it is often very difficult to eliminate a pest once it gets inside. Insects like thrips, aphids or spider mites, as well as fungal spores from powdery mildew are common hitchhikers on plants sourced from poorly managed gardens or brought in from outdoors, and so proper quarantine procedures are very important. Just like when buying any new plants from a greenhouse, keep them isolated from your main garden space and observe carefully until you are sure they are clean and safe to add to your garden. Using insecticidal and fungicidal dips to wash clones can help control and eliminate any pests that may be lurking. Once you are sure the plants are clean, transplant as normal and get growing!
Below are some suggestions for additional equipment and helpful items that are useful to have, especially in indoor gardens.
Outdoors
Most, if not all your standard gardening equipment will be able to be used with your cannabis plants. Watering cans, hoses, shovels/trowels, hoes, etc. - cannabis does not need any special equipment to grow outdoors. If it works for your tomatoes, it should work for your cannabis!
Indoors
Growing indoors requires a few extra items to be able to grow easily and efficiently. A watering can is essential – the one you use for your houseplants (if you have them) should be more than adequate.
A programmable timer to use with your lights also needed. This allows you to control and change the daily amount of light (and darkness) at any point during the grow, which is important when you are ready to start the flowering stage if using photoperiod type plants. It is also important to give your plants a period of darkness to ‘rest’ and so using a timer is crucial.
Ratcheting hanging ropes are also recommended to be able to easily adjust the height of the lights as the plants grow taller. Plants grow quite fast and so it is important to maintain a reasonable distance from the tops of the lights so as not to damage them. Ratchet hangers make this very easy!
Circulation fans are another important addition to your indoor grow. Moving the air around in your growing area is important to keep the air around your plants supplied with fresh air. Using small 6 inch clip fans attached to the frame of the tent can help to keep air moving and refreshed. They can also help to cool the lights if positioned to push air over the light fixture. Small fans can also be placed on the floor of the tent to help move the air around in the under-canopy, which can help prevent issues with mold or other pests, as well as general air circulation.
Thermometers and/or hygrometers are used to keep track of the temperature and humidity conditions in your garden. Not absolutely necessary, but highly recommended.
Power bars are very useful to be able to plug multiple things into. Many have surge protection built in, which can help in preventing damage to your equipment. Just ensure you do not plug too many items in and overload the circuit!
Cannabis Life Cycle
To be able to grow cannabis as easily and efficiently as possible, it is important to understand the basic life cycle and stages of growth that cannabis undergoes. Depending on what kinds of plants you decide to grow (photoperiod, autoflower, indica, sativa), these stages can vary in length but will always occur in the same order.
Use the tabs above to learn the basics about the cannabis life cycle and click on the articles within each section for details and best practices for each stage.
The life of a cannabis plant begins with germination, which is when the tiny seedling initially emerges from its shell (aka the pericarp). Germination isn’t so much a stage as it is an event and is very important! It occurs when the seed breaks its dormancy and opens, allowing the tiny plantlet within to begin to grow. Once open, a tiny root (the radicle) emerges. This is what will become the taproot of your plant. The taproot grows down into the medium and begins producing secondary roots and fine root hairs which anchor the plant and begin absorbing nutrients and water.
The first “leaves” will also emerge. These are not true leaves, they are called cotyledons (cottle-ee-dons) and are used as nutrient reserves for the young plant. They are also the first part of the plant to begin to photosynthesize and make food for seedling to use.
Seeds should be planted approximately 1 cm deep in your media and germination usually takes between two and seven days for most healthy, viable seeds. For more details and best practices, check out our article on germinating cannabis seeds!
Once the new plant has emerged from the medium, and with the appearance of its first “true” leaves, it is now officially a seedling!
During this stage, the plant will begin using light and photosynthesizing to produce food to use and grow. For the first week or so after emergence, there will be slower above-ground foliar (leaf) growth as the plant is focused on setting up a robust rootzone. You can think of it as if the plant is “getting settled” in its new home. Soon after, leaf and stem growth will catch up to the roots and the plant will continue to grow for another couple of weeks, after which it begins vegetative growth.
During this time, its is crucial to provide the plant with proper conditions to prevent issues and avoid future problems. The rootzone is sensitive to both moisture and temperature fluctuations and so ensuring these parameters stay relatively constant is important.
The seedling stage usually lasts for about three weeks. For details and best practices, check out our article on the cannabis seedling stage!
At the end of the seedling stage, growth rates increase significantly, and vegetative growth begins. The vegetative stage is the time in the plant’s life where the most growth occurs. This is the “bulking up” stage – plants are grown until a desired size and shape is attained. Photosynthesis is at its highest rate under long periods of intense light. Water and nutrient needs increase substantially as the plant grows and increases the volume of its roots and shoots, and so it is important to ensure the plant is not limited to maximize efficiency, yield, and overall plant health.
Most manipulation and shaping of the plant (“training”) takes place during this time. This is where the grower shapes the plants to their preference and style and is done to increase yields and utilize the space efficiently. Pinching, topping, bending – everything that is done in your regular garden can be done with cannabis. Transplanting also occurs during this stage, as the plant will likely outgrow its starter pot, if growing in containers. It is important to provide the roots with enough room to grow without being restricted for happy and healthy plants.
Early on in this stage, usually around week four or five, is when “pre-flowering” begins. This is an indication that the plants are sexually mature and able to begin flowering if triggered. Pre-flowers are single male or female flowers that begin to grow at the nodes (where the branches grow out of the stem) and can be used to determine the gender of the plant.
The length of this stage can vary greatly depending on the grower’s goals and desired plant size. In general, the longer you “veg” your plants, the larger they will get. If growing photoperiod-type plants outdoors in Saskatchewan, this stage lasts until early to mid September when the day length naturally shortens to less than 13 hours. Indoors, many growers grow their plants vegetatively for 3-4 weeks, but this can be highly variable depending on the desired outcome. For autoflowering plants, this stage typically lasts three to five weeks.
For a detailed look into these topics and best practices, check out our article on the vegetative stage of cannabis!The final stage in the cannabis plant's life is flowering. During flowering, the amount of light per day is reduced to a critical amount, new leaf and new stem production slows, existing stems elongate, and the plant begins to redirect its resources towards reproduction – making seeds and pollen. In photoperiod-type plants, this stage is triggered by subjecting the plants to 12 hours (or less) of light per day. Autoflowering plants will begin to flower automatically (hence the name) after approximately 4 -5 weeks of total growth, regardless of the amount of light in the day.
This stage can be highly variable in length depending on what genetics you are using. Some “indica-type” plants will mature in as little as seven to eight weeks, where some exceptionally long flowering “sativa-types” may take 20 weeks, or even longer. Most commercially available plants will finish between eight to ten weeks. This stage is often broken up into two sections: early and late flowering.
During early flowering, plants begin reallocating resources and preparing for reproduction. Nutrient needs change, now requiring more phosphorus, potassium and calcium and less nitrogen than in vegetative growth. New leaf and new stem growth slows, and existing stems begin to elongate in what is often referred to as “The Stretch”. During this period, plants can sometimes double, triple, or even quadruple in height, so it is important to know what kind of genetics you are working with to avoid issues with space and excessive height. The author has had to cut the tops off plants to fit under the lights on more than one occasion – best avoided if possible! Pruning branches should also be avoided during this time as it can cause excessive stretching beyond what would normally occur.
In female plants, white hairlike structures will also begin to appear at the growth tips and nodes. These are stigmas and are growing from the newly forming flowers. Stigmas are the female reproductive organ of the plant and are where the pollen lands (if present) to complete fertilization, resulting in a seed. As most growers do not want seeds, any remaining males should be removed at this time. This results in the female plants continuing to grow unfertilized flowers, resulting in seedless cannabis (“sinsemilla”).
For most commonly available varieties, early flowering lasts for about 3 weeks. In some of the more exotic “sativa” types this can last for 6 weeks or more. Check out our article on the flowering stages for details on light, water, nutritional, and environmental preferences.
Late flowering begins when the plant has stopped growing vertically (“stretching”) and is now exclusively focused on producing flowers. This is probably the most exiting part of the grow as you finally, and quite literally, get to see and smell the fruits of your labours! Flower bracts form and continue to grow at the growth tips and nodes. Light schedule and nutrient regime are maintained from early flowering, and the plant now begins to produce sticky resin on the rapidly growing flowers. This resin is made up of capitate-stalked glands called trichomes and contains sticky cannabinoid and aromatic terpenes. This resin is most growers’ desired product and is what produces and delivers the effects of cannabis.
As the weeks progress, the flowers continue to grow and begin to form clusters. These clusters of buds, when trimmed and dried, are what most cannabis consumers are familiar with as “dried flower”. Flower production continues as the buds bulk up and odours begin to develop and mature. Some plants may even require staking and support as the buds develop to hold up the increasing flower weight.
During the final couple weeks of flowering, new flower growth slows and existing flowers swell, increasing in weight and trichome density. Once the plant has reached its peak weight, trichome density, and cannabinoid maturity, it is harvested.
Late flowering lasts for approximately four to six weeks for most commonly available varieties. Check out our article on the flowering stages for more details and best practices.
Harvest/Post-Harvest
As the grow comes to an end, it is time to begin to prepare for the harvest! Your hard work and time spent will soon pay dividends. And, just like with your fruits and vegetables in the garden, harvest timing is critical to ensure peak ripeness resulting in the best quality, flavour, and experience possible.
Deciding when to harvest can and will be based on many factors. Some are objective, measurable characteristics, and others are based on personal preference. Very generally, most available varieties will be ready harvest 8 – 10 weeks after initiating flowering. Some seed companies include the average time to harvest in the info on their packaging, but this should be taken as a very general guideline, at best.
Physical signs that your plant is ready for harvest include yellowing in the leaves, decreased water uptake, and a cessation of bud swelling and growth. These signs indicate the plant has nearly completed its life cycle and is preparing for death (senescence). The white hairs (aka stigmas) also will turn from a healthy white to a rusty brown colour. This is sometimes associated with ripeness with more brown stigmas indicating more mature plants. In the author’s opinion, this is a less accurate way to assess maturity but is still valuable to consider.
The most common method of judging ripeness is by observing the capitate-stalked trichome heads, the round bulbous glands that hold the sticky resin containing the cannabinoids and terpenes. These trichome heads change colour as they mature, going from clear to cloudy to amber orange. A small hand lens or handheld microscope is useful for inspecting the trichomes.
The author’s preferred strategy is to observe both the plant and the trichomes, harvesting when the heads first begin to go from cloudy to amber, as well as when the plant begins to yellow and enter senescence. There is usually about a 5-day window where peak ripeness is more or less maintained, after which the trichomes begin to degrade and cannabinoid levels fall.
For details on cannabis maturity as well as photos of the resin glands and their different colours/maturity stages see our article on timing your harvest.
Before you actually begin to harvest, you should prepare your work space. Having a solid plan and good organization will help to avoid stress and reduce the workload and so ensuring everything is ready to go before you start is crucial for a smooth and successful harvest.
Equipment Needed
Once you have decided it is time to harvest, you will need to gather some crucial equipment before you can start:
- A pair (or three) of comfortable and precise pruning scissors is absolutely required. You will be potentially trimming your plants for an extended period of time, depending on the yield, and so comfortable scissors are very important. If you have trouble with repetitive manual tasks, you may want to ask someone for assistance during this part of the grow.
- An area to dry your cannabis. This should be a space where the humidity and temperature can be controlled and maintained. Many growers opt to use their grow tent as a drying space as it is easy to control the air intake and exhaust, as well as can be fitted with items such as a humidifier to help increase humidity (usually needed here in SK). More on this under the Drying tab.
- Various collection trays or pails to hold trimmings. Some growers opt to separate and collect the small, resinous sugar leaves (“trim”) to make secondary products such as hash or infused edibles. This is optional but often worth the effort.
- Disposable rubber gloves are very useful in keeping your hands clean and free of resin, which will inevitably build up as you handle the plants.
- A good chair and table are also needed for comfort and space to work. Enough room for you to be able to sit and work easily and comfortably and is ideally located close to your drying area.
- A speaker and some good music or podcast. This is optional but definitely makes the time pass a bit faster.
Also remember to set aside enough time to finish harvesting. Don’t rush! For four average sized plants, the author would set aside about 3 hours. This will be different for each grower based on their trimming skills and preferences.
Trimming (manicuring) is not absolutely necessary but makes the user experience much more enjoyable and is highly recommended. The idea is to separate all non-resin containing parts of the plants from the resinous flowers and to shape them into the familiar product we all know and love. The large fan leaves are completely removed, and the small “sugar leaves” are trimmed to ensure uniform and aesthetic buds. This can be done while the plants are fresh, or after they have been dried.
As mentioned in the equipment section, a good pair of trimming scissors is required. Ensure you are comfortable using them for extended periods as trimming can often take multiple hours and is quite repetitive. If you have trouble with manual, repetitive movements, it may be worth asking a friend for some assistance trimming your plants. Also make sure you are comfortable and in a well-ventilated area as the smell can be quite strong.
There are two basic strategies for trimming cannabis: “wet” and “dry”. What you choose will depend on your preferences and schedule and is basically a question of “Do I want to trim my plants now or later?”
Wet Trimming
Wet trimming is done immediately after harvesting the plants. The plants are still full of water, hence the name (aren’t growers creative?). Individual branches are usually removed (unless dealing with a very small plant), large fan leaves are cut off, and smaller resinous sugar leaves are trimmed back close to the buds. Removing as much unneeded plant matter as possible will help to speed drying. Once dry, the buds can be easily removed from the stems and are now able to be consumed. This method is many growers’ preferred choice (including the author) in terms of trimming their cannabis.
Gardener’s Note: Some growers like to separate and collect the resinous sugar leaf trimmings to make concentrated products like hash, or for use in edibles. This is up to the individual but is often worth the extra effort. Additionally, one of the biggest bonuses of wet trimming is the resin that builds up on your scissors. Called “scissor hash”, it is some of the highest quality product there is!
Dry Trimming
Dry trimming happens after the plant has been dried. When plants are harvested, most of the leaves are left intact and not removed before the plant is hung to dry. Growers will also often hang whole plants without removing any branches. Once fully dried, the large fan leaves are removed, and the buds are manicured to the growers’ preference. Because the plant has a much higher initial water content due to the extra leaves and stems (compared to wet trimming), the plants may take longer to dry. Dry trimming can be a good option if you need to harvest your plants but are unable to set aside the time for wet harvesting.
Gardener’s Note: There are many partially and fully automated machine trimmers that are used in larger scale and industrial settings, but these are usually much too large for the average home grower and out of the scope of this guide.
Check out our article about trimming for the pros and cons of each method as well as detailed photos and examples.
Once your cannabis has been harvested and (wet) trimmed, it now needs to dry. Drying is straightforward but needs to be done correctly to both maintain the flavour profile of the plant and get it to a form where it can be used and enjoyed. You can only dry your plants once, so it is important to do it right the first time!
Fresh cannabis plants are roughly 90% water compared to properly dried cannabis, which is ideally between 10% and 13%. This is a lot of water to lose! When wet trimmed, most average sized cannabis plants should take 10-14 days to fully and properly dry under ideal conditions. The most substantial size and weight reduction happens in the first 4 to 5 days – this is when most of the water is lost. Afterwards, water loss slows, buds tighten up, and chlorophyll and other plant compounds begin to change and/or break down. If cannabis is dried too quickly, these compounds can remain in the buds, imparting off flavours and greatly reducing the quality. If you have ever had cannabis that burns poorly and smells like hay, improper drying is likely why. Drying should also be done in the dark as light and UV can degrade the resin quality.
Drying is complete when the buds/branches have lost approximately 75% of their original weight. For example, if a branch weighs 40 grams wet, it should weigh about 10 grams when properly dried. Another common way of assessing dryness is whether the bud “snaps” or breaks off the stem. If it cleanly snaps off the stem, it is most likely dry enough. If it peels along the stem or bends but doesn’t break, it still needs a few more days. After drying, the buds can be removed from the stems and stored.
Where Can I Dry my Cannabis?
This can be done anywhere that you can maintain a constant temperature of 16°C to 23°C (the lower the better) and between 50% and 60% relative humidity. The air inside the space should also be refreshed periodically and potentially passed through an odour control system such as a carbon filter (if needed - it will be very smelly!). Many growers (the author included) opt to use their grow tents to dry their harvest as they are mostly isolated from the outside environment with good control over intake and exhaust. Branches are hung from the ceiling of the tent using string. For more details see our article for on setting up a grow tent for drying cannabis.
Drying Tips
There are a few key points to keep in mind when thinking about drying cannabis:
- Don’t overcrowd the bud. Ensure there is some space between for air circulation and movement.
- Do have a fan running to move air within the drying space. This helps to refresh the air around the buds and ensure even and consistent drying. Make sure the fan is not blowing directly at buds as this can cause uneven drying.
- Use a humidifier/dehumidifier as needed. This will depend on your local environmental conditions.
- Be sure the cannabis is fully dried before storing. If stored with too much moisture, there is high likelihood of developing off tastes and smells, as well as growing mold. Buds should easily break or snap off stem when ready to be stored.
- Check daily to ensure proper conditions are maintained.
- Do not dry plants in the same room or tent as where plants are growing.
Curing is an optional but often practiced final step in the post-harvest processing of cannabis. It is analogous to aging wine: while the initial product is useable, but storing it medium to long term to cure and age often enhances and improves the taste, flavour, and overall user experience. The profile continues to develop and mature, bringing out the true “personality” of your cannabis. Cannabinoid content should not change much over this time, unless exposed to excess amounts of light or heat.
It is also important to consider that not all cannabis needs to be cured. Curing your cannabis is ultimately up to you: some growers prefer not to cure it at all and begin consuming immediately. In the author’s experience, some cannabis is best used as soon as possible due to its unique terpene and volatile sulphur compound (VSC) contents, while others need extended periods for flavours to develop and mature. There is absolutely nothing wrong with using your cannabis as soon as it is dried, but if you do choose to cure your cannabis, follow the steps below:
How to Cure
- When bud is fully dried, it should be placed in airtight containers. Glass mason jars (the same ones we use for canning) are the standard most growers use, but there are many other options, depending on your needs and preferences.
- Gently place buds in container without forcing or damaging them. Fill container, write the date on the lid, and store in a cool, dry, and dark spot.
- Check buds in a few hours to see if buds feel more moist than when they were put in. Moisture will move from the stem to the leaves and can build up inside the densely packed and sealed container. If needed, leave jar open and/or spread buds out to allow to dry for a bit longer. Refill, reseal jar, and monitor.
- If buds do not feel different, for the first week open the container 2 to 3 times daily to release moisture and refresh the air within. Visually inspect the buds and take note of any off smells which may indicate mold or disease contamination.
- After the first week or so, moisture contents should be in equilibrium. Check jars once or twice weekly for the next 2 to 4 weeks. Most bud is fully cured after this time and can be stored for up to year (sometimes longer) under ideal conditions.
Proper storage is important to preserve your harvest to be enjoyed and protect it from rapid and unnecessary degradation. Exposure to light, heat, and oxygen can degrade the quality and reduce the potency of your cannabis. External air dries out bud very quickly, making it unpleasant to use. This is especially important here in Saskatchewan where it is exceptionally dry, especially during the winter. In addition, oxygen reacts with THC, causing it to slowly change into another cannabinoid called cannabinol, or CBN. This is usually not desired and so storing your cannabis the right way is important. With this is mind, it is best to open the main storage container as little as possible, so many people keep a smaller container on hand with a few days’ worth of flower, refilling it as needed. This reduces the amount of external exposure for your main stash of cannabis, helping to preserve it long term.
Location
Cannabis should ideally be stored in a cool, dark area away from light and large temperature swings.
Containers
There are many choices of containers to store cannabis - glass mason jars, metal containers with airtight lids, sealable plastic bags, and anything else that has an airtight seal. A good rule of thumb is that if you can smell it, it is not airtight. For detailed descriptions and photos, see our article about how to properly store your cannabis.
Troubleshooting
Coming soon!
Coming soon!
Current Research
Coming soon!
FAQs - coming soon!
About the Author
My name is Chase Boucher and have been growing cannabis for myself for about 15 years (as of 2026). Since I was diagnosed with IBS (irritable bowel syndrome) in 2012, cannabis has been my medicine of choice and has been instrumental in helping me live a less stressful and more comfortable life. Academically, I have a B.Sc in Geology from the USask (2014) and am currently working towards a B.Ag with a major in Horticulture Science, minor in Soil Science. I've also spent 4.5 years working in the Canadian cannabis industry running ethanol extraction and fractional distillation processes and equipment for a local extraction company, and so am well versed with both the biology and chemistry of cannabis and its derivatives. Besides growing and talking about cannabis, I also enjoy growing other plants in my garden (hot peppers, orchids, fruit trees), skateboarding/biking, travelling, going to live music, and enjoying good food and wine.